Honey Garlic Butter Chicken: I burned chicken thighs three times before I figured out the one trick that actually matters. It’s not the marinade. It’s not some fancy pan. It’s how long you leave the skin alone once it hits the heat.
Once I got that down, this became the recipe I make when I want people to think I tried way harder than I did.
Side Note: This is also the recipe that finally got my dad to stop asking for “plain chicken.” That’s saying something.
Why This Recipe Works
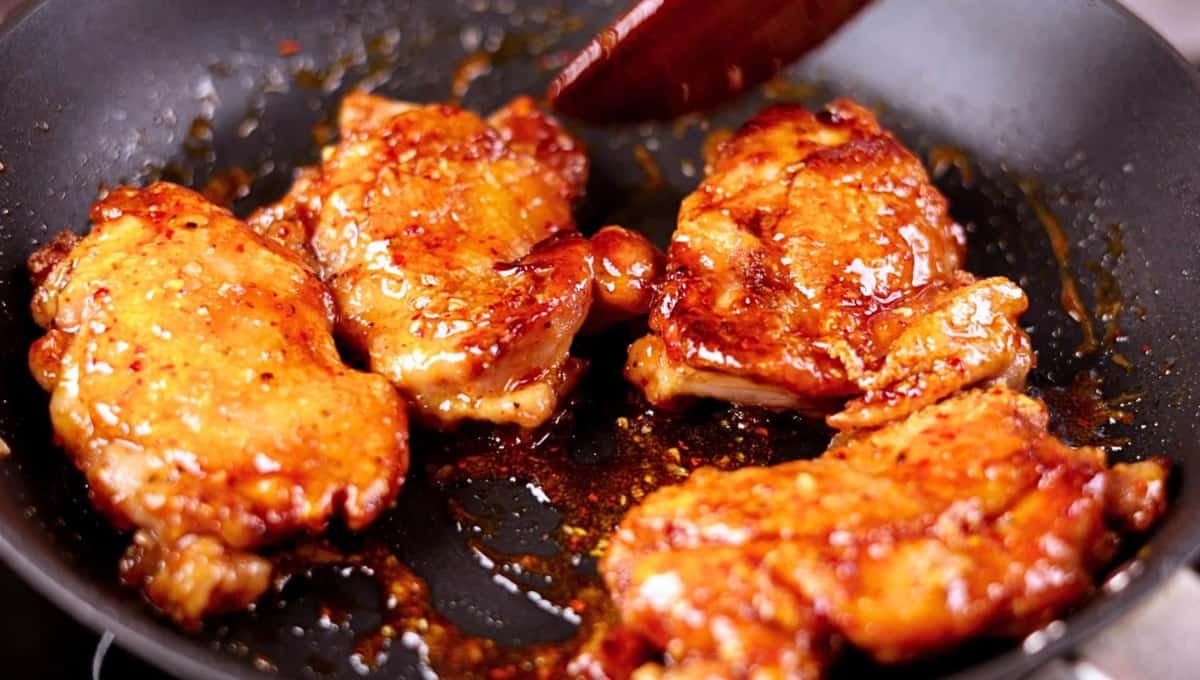
Chicken thighs are honestly the most forgiving protein in your kitchen.
They’ve got more fat than chicken breast, which means more flavor and way less risk of drying out. You’d genuinely have to try to mess these up.
I used to be a strict chicken breast person. Then I actually compared the two side by side and the thighs won by a landslide. Breast meat goes from perfect to chalky in about 90 seconds. Thighs give you a much bigger window to get things right.
The sauce is where the magic happens though. Honey, garlic, butter, and a splash of soy sauce reduce down into something sticky and glossy that clings to every bite.
There’s a small amount of vinegar in there too, and it’s doing more work than you’d think. It cuts through the sweetness so the sauce doesn’t taste like straight candy.
And because it’s all one pan, cleanup takes about four minutes. I timed it.
Fun fact: the crispy skin you get here comes almost entirely from rendered fat, not oil. That’s why patting the chicken dry matters so much. Any extra moisture gets in the way of that process.
Read this also: Grilled Bacon-Wrapped Corn That Might Just Steal the Show at Your Next BBQ
What You’ll Need
| Ingredient | Amount |
|---|---|
| Bone-in, skin-on chicken thighs | 6 (about 2.5 lbs) |
| Salt | 1 tsp |
| Black pepper | 1/2 tsp |
| Garlic powder | 1 tsp |
| Olive oil | 1 tbsp |
| Unsalted butter | 3 tbsp |
| Garlic, minced | 5 cloves |
| Honey | 1/3 cup |
| Soy sauce | 2 tbsp |
| Apple cider vinegar | 1 tbsp |
| Red pepper flakes | 1/4 tsp (optional) |
| Fresh thyme sprigs | 2-3 |
Side Note: Bone-in, skin-on is non-negotiable for me here. The skin is basically the whole point.
Tools You’ll Need
- Large cast iron or stainless steel skillet (oven-safe)
- Tongs
- Small mixing bowl
- Meat thermometer
Pro Tips
1. Dry the chicken like you mean it. Pat it down with paper towels until it feels almost tacky. Wet skin steams instead of crisping, and steamed skin is sad skin.
2. Don’t touch it once it’s in the pan. I know it’s tempting. Let it sit undisturbed for a full 6-7 minutes so the skin can actually release from the pan on its own.
3. Skin side down first, always. This renders the fat and gives you that shatter-crisp texture before the chicken ever sees the oven.
4. Use a thermometer, not a clock. 165°F at the thickest part is the only number that matters. Ovens lie.
5. Let it rest for 5 minutes before serving. The juices redistribute and you avoid a puddle on the cutting board.
6. Prep everything before you turn on the heat. This sauce comes together fast once the garlic hits the butter. Have your honey, soy sauce, and vinegar measured out ahead of time so nothing burns while you’re reaching for a bottle.
Cooking Time Efficiency Tips
This is a genuinely quick recipe, but a few small habits shave off even more time.
- Measure your sauce ingredients while the chicken sears. You’ve got a solid 6-7 minutes of dead time to work with.
- Use a skillet you already trust is oven-safe. Checking mid-recipe wastes time and stresses you out for no reason.
- Preheat your oven before you even start seasoning the chicken. By the time the sauce is ready, it’s already at temperature.
- Line your resting plate with foil so you’re not scrubbing a second dish later.
Step-by-Step Instructions

Season the Chicken
Pat the chicken thighs completely dry with paper towels.
Season both sides generously with salt, pepper, and garlic powder.
Sear the Skin
Heat olive oil in your skillet over medium-high heat until it shimmers.
Place the thighs skin side down. Don’t move them.
Let them sear for 6-7 minutes, until the skin is deep golden brown and releases easily from the pan.
Flip and cook the other side for 3 minutes. Remove the chicken to a plate.
Build the Sauce
Lower the heat to medium and add the butter to the same skillet.
Once melted, add the minced garlic and cook for 30 seconds, just until fragrant.
Stir in the honey, soy sauce, apple cider vinegar, and red pepper flakes. Let it bubble for a minute.
Read this also: This Buffalo Chicken Dip Made My Brother-in-Law Go Silent Mid-Sentence
Finish It Off
Nestle the chicken back into the skillet, skin side up, along with any juices from the plate.
Add the thyme sprigs on top.
Transfer the skillet to a 400°F oven and bake for 15-18 minutes, until the chicken hits 165°F internally.
Spoon the sauce over the top before serving.
Substitutions and Variations
| Original | Swap |
|---|---|
| Bone-in thighs | Boneless (reduce oven time to 8-10 min) |
| Honey | Maple syrup |
| Soy sauce | Coconut aminos (gluten-free) |
| Apple cider vinegar | Lime juice |
| Thyme | Rosemary |
| Butter | Ghee (for dairy-sensitive folks) |
Want it spicier? Double the red pepper flakes and add a small drizzle of sriracha into the sauce.
Want it more citrusy? Swap half the honey for orange juice and toss in some orange zest at the end.
Make Ahead Tips
You can season the chicken up to 24 hours ahead and keep it covered in the fridge. This actually helps the salt work its way in for better flavor.
The sauce ingredients can also be pre-measured into a small jar so you’re not fumbling around mid-cook.
I wouldn’t fully cook this ahead of time though. The skin loses its crispness fast once it sits.
Leftovers and Storage
Store leftovers in an airtight container in the fridge for up to 4 days.
To reheat, skip the microwave. It turns the skin rubbery and nobody deserves that.
Instead, reheat in a 375°F oven or air fryer for 8-10 minutes until warmed through and the skin crisps back up.
You can also freeze the cooked chicken (without extra sauce) for up to 3 months. Thaw overnight in the fridge before reheating.
Nutritional Snapshot (Per Thigh)
| Nutrient | Amount |
|---|---|
| Calories | ~320 |
| Protein | 22g |
| Fat | 21g |
| Carbs | 12g |
| Sugar | 11g |
Side Note: These numbers will shift depending on thigh size and how much sauce you spoon on. Consider it a ballpark, not gospel.
What to Serve With It
This sauce is basically begging for something to soak it up.
- Garlic mashed potatoes
- Steamed jasmine rice
- Roasted broccoli or green beans
- A simple cucumber salad to cut the richness
For something lower carb, try it over cauliflower rice or a big bed of sautéed spinach.
FAQs Related to Honey Garlic Butter Chicken
1. Can I use boneless, skinless chicken thighs?
Yes, but you’ll lose the crispy skin factor and the cook time drops significantly, closer to 15-18 minutes total.
2. Why is my sauce too thin?
Let it simmer a bit longer before adding the chicken back in. It should coat the back of a spoon.
3. Can I make this on the stovetop only, without the oven?
Yes. Cover the skillet and cook on low-medium for about 15 minutes after adding the sauce, flipping once.
4. Is this recipe spicy?
Not really, the red pepper flakes add warmth, not heat. Leave them out entirely if you’re feeding little ones.
5. Can I double this recipe?
You can, just use a larger skillet or work in two batches so the chicken isn’t crowded during the sear.
6. What happens if I skip searing and just bake it?
You’ll still get a fully cooked, tasty dinner, but the skin will turn out soft instead of crisp. The sear is really what separates this from an average sheet pan chicken recipe.
7. Can I use chicken drumsticks instead?
Yes, drumsticks work great with this same method. Just check the internal temperature since they can cook slightly faster than thighs depending on size.
8. My honey garlic sauce burned in the oven. What went wrong?
Honey has a lower burn point than most people expect. If your oven runs hot, keep an eye on it after the 12 minute mark and tent with foil if it’s browning too fast.
Conclusion
This is one of those recipes that looks like it took real effort and actually just took patience. Give the skin the time it needs, trust the thermometer, and you’ve got a dinner that tastes like you’ve been cooking chicken thighs for years.
Make this one and let me know how it turned out in the comments below. I want to hear if you tried any of the variations, or if the sauce disappeared before it even made it to the plate.