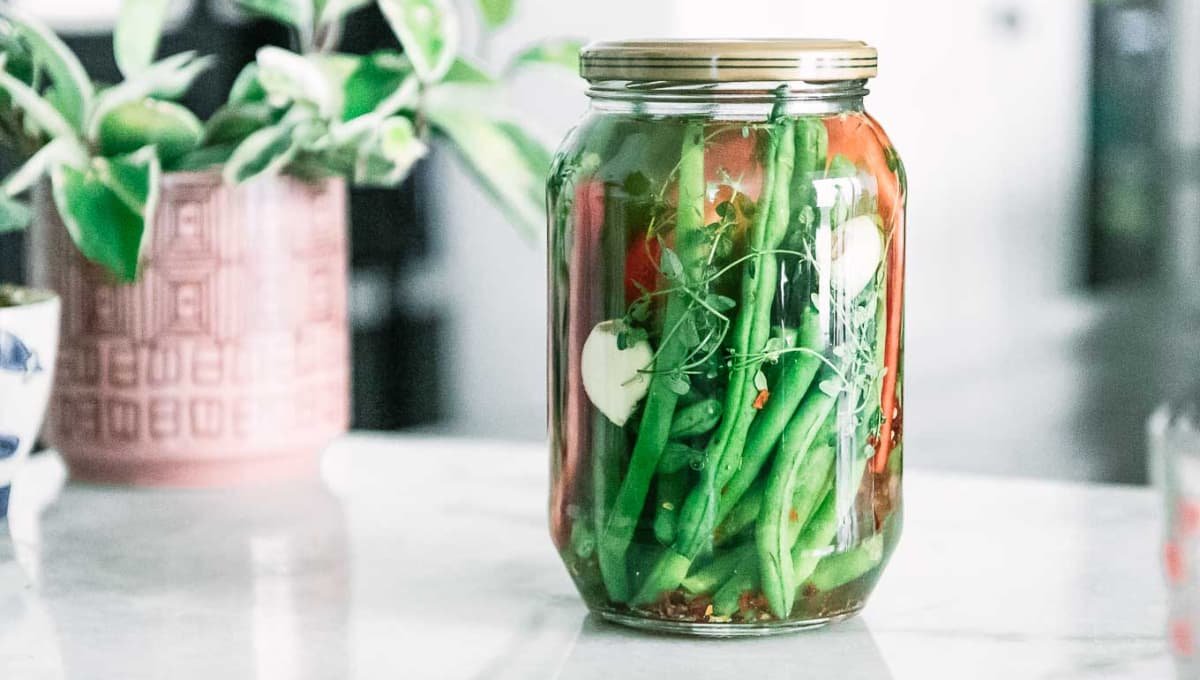
Crunchy Pickled Green Beans: I used to think pickling was one of those things you needed a whole weekend and a shelf of mason jars for.
Turns out, I was wrong. Pickled green beans might be the easiest thing I’ve ever made in my kitchen, and now I keep a jar in my fridge at all times like it’s a personal rule.
They’re crunchy, tangy, a little spicy if you want them to be, and they make everything from a charcuterie board to a Bloody Mary about ten times better.
My husband Silas actually thought I bought these from a farmers market the first time I made them. I did not correct him for a solid five minutes.
Side Note: If you love quick pickled things, you’ll probably also love how forgiving this recipe is. There’s basically no way to mess it up.
Growing up, my grandma always had a jar of something pickled sitting in her fridge. Beets, cucumbers, whatever her garden gave her that summer.
I never really appreciated it until I started my own little pickle jar collection years later.
Green beans were the first thing I tried on my own, mostly because I had a bag of them going a little limp in my crisper drawer and didn’t want to waste them.
Best accident I’ve ever had in the kitchen, honestly.
Why You’ll Love This Recipe
These aren’t fermented pickles, so there’s no waiting weeks for anything to happen. This is a refrigerator pickle, which means you make the brine, pour it over raw green beans, and let the fridge do the rest.
They stay snappy and crisp, not soft or mushy like some canned pickles can turn out.
And honestly, the flavor gets better every single day they sit in that jar.
Read this also: This 5-Minute Yum Yum Sauce Beats Any Hibachi Grill
What You’ll Need
| Ingredient | Amount |
|---|---|
| Fresh green beans, trimmed | 1 pound |
| White vinegar | 1 cup |
| Water | 1 cup |
| Kosher salt | 1 tablespoon |
| Sugar | 1 tablespoon |
| Garlic cloves, peeled | 3 |
| Fresh dill (or 1 tsp dried) | 2 sprigs |
| Black peppercorns | 1 teaspoon |
| Mustard seeds | 1/2 teaspoon |
| Red pepper flakes (optional) | 1/2 teaspoon |
Side Note: Grab the freshest, firmest green beans you can find. Older beans go soft way faster in the brine, and you’ll lose that satisfying crunch.
Tools You’ll Need
- A medium saucepan
- A 1-quart mason jar with a lid (or two smaller jars)
- A sharp knife or kitchen scissors
- A measuring cup and spoons
- Tongs or a fork for packing the jar
Pro Tips
1. Trim the beans to fit your jar, not the other way around. Stand a bean up against your jar and trim it about half an inch shorter than the rim. This keeps them fully submerged in brine.
2. Blanch for 60 seconds if you want extra-crisp beans. It’s not required, but a quick dunk in boiling water followed by an ice bath locks in that snap.
3. Pack the jar tight. The beans should be snug enough that they don’t float around once you pour in the brine.
4. Let the hot brine do the work. Pouring the brine in while it’s still hot helps pull all that garlicky, dilly flavor into the beans faster.
5. Wait at least 24 hours before eating. I know it’s tempting to try one right away. They’re good, but they’re so much better the next day.
Time-Saving Tip
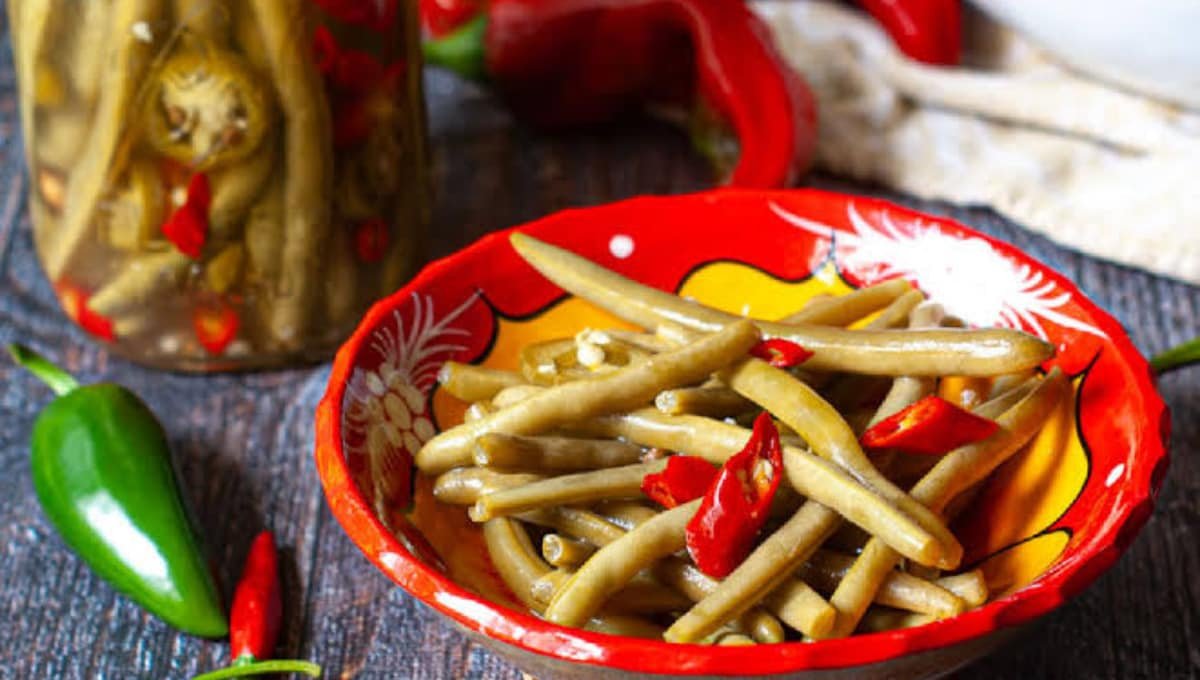
This whole recipe takes about 20 minutes of actual hands-on work.
The rest is just waiting, which means you can prep the brine while doing something else entirely, like cleaning up the rest of your kitchen or prepping dinner.
If you’re making a bigger batch for gifts or meal prep, double or triple the brine recipe and just keep pouring it over jar after jar. The ratio stays the same no matter how much you’re making.
Read this also: Chicken Fried Chicken So Crispy It Tastes Like a Diner Made It
How to Make Pickled Green Beans
Step 1: Prep the beans
Wash your green beans and trim off the stem ends. Trim the other end too if it looks a little rough.
Stand the beans up next to your jar and cut them so they’ll sit about half an inch below the rim.
Step 2: Make the brine
In a medium saucepan, combine the vinegar, water, salt, and sugar.
Bring it to a boil over medium heat, stirring occasionally until the salt and sugar fully dissolve.
Step 3: Load up the jar
Add the garlic cloves, dill, peppercorns, mustard seeds, and red pepper flakes (if using) to the bottom of your jar.
Pack the green beans in standing upright, as tight as you can get them.
Step 4: Pour and seal
Carefully pour the hot brine over the beans, making sure they’re fully covered.
Leave about half an inch of space at the top of the jar.
Let the jar cool on the counter for about 20 minutes, then seal it with the lid.
Step 5: Chill and wait
Pop the jar in the fridge.
Let it sit for at least 24 hours before you dig in. Two to three days is even better if you can manage the patience.
Substitutions and Variations
| Original | Swap It For |
|---|---|
| White vinegar | Apple cider vinegar (for a milder, fruitier tang) |
| Sugar | Honey or a sugar substitute |
| Fresh dill | 1 teaspoon dried dill |
| Red pepper flakes | 1 sliced jalapeño for spicier beans |
| Mustard seeds | Coriander seeds |
| Green beans | Wax beans or a mix of both |
Side Note: Want them extra spicy? Add a whole small dried chili pepper to each jar along with the red pepper flakes.
Make Ahead Tips
This recipe is basically made for making ahead. In fact, it needs at least a day of fridge time before it’s ready to eat anyway.
You can make a big batch and split it into multiple jars, so you always have one ready to open.
They also make a really fun homemade gift, especially around the holidays. Tie a little ribbon around the jar and you’re done.
Leftovers and Storage
Keep your pickled green beans sealed in the fridge, and they’ll stay good for up to 2 months.
Always use a clean fork or tongs when grabbing beans out of the jar. This keeps the brine from getting contaminated and helps them last longer.
There’s no reheating involved here since these are meant to be eaten cold or at room temperature straight from the jar.
Nutritional Snapshot
Per serving (about 5-6 beans):
- Calories: 15
- Carbs: 3g
- Sugar: 1g
- Sodium: 290mg
- Fiber: 1g
- Fat: 0g
Side Note: These are naturally low calorie, low fat, and gluten free, which makes them a great snack if you’re watching what you eat but still want something with a lot of flavor.
Meal Pairings
- Serve alongside a charcuterie or snack board with cheese and crackers
- Drop a couple in a Bloody Mary for garnish
- Chop them up and add to a potato salad for extra tang
- Pair with grilled burgers or hot dogs instead of regular pickles
- Serve next to a sandwich for a crunchy side
FAQs Related to Crunchy Pickled Green Beans
1. Do I need to can these to make them shelf stable?
No. This is a refrigerator pickle recipe, so there’s no canning process involved. Just make sure to keep the jar in the fridge at all times.
2. How long do pickled green beans last?
Stored properly in the fridge, they’ll stay good for up to 2 months.
3. Can I reuse the brine for a second batch?
I don’t recommend it. The brine loses some of its acidity and flavor strength after the first use, so a fresh batch works best for food safety.
4. Why are my pickled green beans soft instead of crunchy?
This usually happens if the beans weren’t fresh to begin with, or if the brine wasn’t fully cooled before sealing the jar with beans already inside it too long. Blanching the beans first can also help keep that crunch.
5. Can I make these without dill?
Yes. Dill adds a classic pickle flavor, but you can leave it out or swap in another herb like thyme or tarragon if you’d rather.
6. Are pickled green beans keto friendly?
Yes, as long as you swap the sugar for a keto-friendly sweetener like monk fruit or erythritol. The rest of the recipe stays low carb as is.
7. Can I use frozen green beans instead of fresh?
I wouldn’t recommend it. Frozen beans have a lot of extra water in them, and they tend to turn mushy once thawed. Fresh beans give you that crisp bite that makes this recipe worth making.
8. Do I have to blanch the beans first?
Nope, it’s optional. Blanching just gives you an extra layer of crunch insurance, but plenty of people skip it and still get great results.
Conclusion
Once you make a batch of these, I promise you’ll start finding excuses to put them on everything. They’re crunchy, garlicky, a little tangy, and they make even a boring weeknight snack plate feel a little more exciting.
Give this recipe a try and let me know how it turns out in the comments below. And if you tweak the spice level or try a new herb combo, I’d genuinely love to hear about it.