
I used to think stuffed chicken breast was one of those “fancy restaurant” dishes. Then I made it at home for the first time and realized something kind of wild: it’s easier than roasting a whole chicken.
Way easier than it looks on your plate, too.
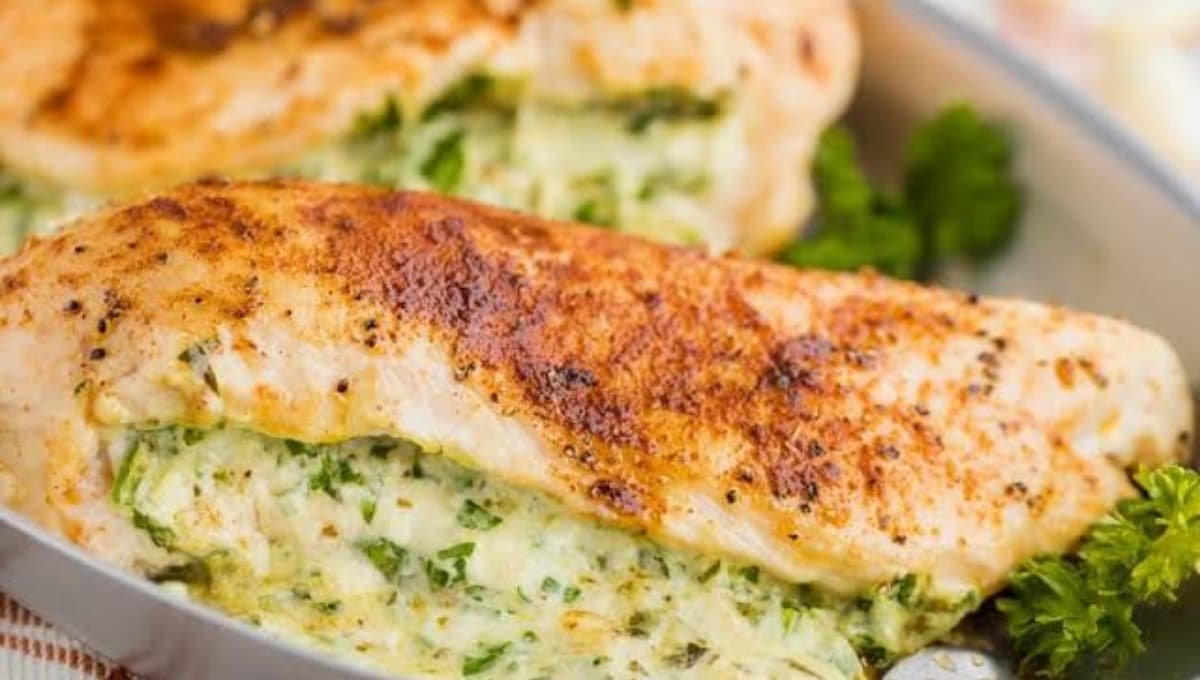
This spinach and cheese stuffed chicken breast has become one of those recipes I make when I want dinner to feel special, but I don’t actually want to work for it. Melty cheese, garlicky spinach, and a golden seared crust on the outside. It photographs like you tried really hard. You didn’t.
Let’s get into it.
What You’ll Need
Here’s everything going into this recipe. Nothing weird, nothing you’ll have to hunt down at three different grocery stores.
| Ingredient | Amount |
|---|---|
| Boneless, skinless chicken breasts | 4 large |
| Cream cheese, softened | 4 oz |
| Fresh baby spinach, chopped | 2 cups |
| Shredded mozzarella cheese | 1 cup |
| Sun-dried tomatoes, chopped | 1/3 cup |
| Garlic, minced | 3 cloves |
| Parmesan cheese, grated | 1/4 cup |
| Olive oil | 2 tbsp |
| Italian seasoning | 1 tsp |
| Paprika | 1/2 tsp |
| Salt | 1 tsp, divided |
| Black pepper | 1/2 tsp, divided |
| Chicken broth (optional, for the pan) | 1/4 cup |
That’s it. Thirteen ingredients and half of them are already in your spice cabinet.
Read this also: Chicken Sausage Sheet Pan Dinner: 1 Pan, Zero Mess
Tools You’ll Need
- A sharp knife (for slicing the pocket)
- A cutting board
- A mixing bowl
- A large oven-safe skillet (cast iron works great)
- Toothpicks, kitchen twine, or a meat mallet if you want to flatten instead
- A meat thermometer 🌡️
That last one isn’t optional. I’ll explain why in a second.
How to Make Stuffed Chicken Breast
Step 1: Make the Filling
In a mixing bowl, combine the softened cream cheese, chopped spinach, mozzarella, sun-dried tomatoes, minced garlic, and parmesan.
Mix until everything is evenly combined. It should look thick and a little chunky, not runny.
Set it aside.
Step 2: Cut the Pocket
Lay a chicken breast flat on your cutting board.
Using a sharp knife, slice horizontally into the thickest part of the breast, creating a deep pocket. Don’t cut all the way through.
Repeat with the rest of the chicken breasts.
Step 3: Stuff It
Spoon the filling into each pocket, dividing it evenly among the four breasts.
Don’t overstuff. It’ll just squeeze out the sides while cooking and you’ll lose all that cheesy goodness.
Secure the opening with a toothpick or two if the filling looks like it wants to escape.
Step 4: Season
Rub each stuffed breast with olive oil.
Sprinkle with Italian seasoning, paprika, salt, and pepper on both sides.
Step 5: Sear
Heat a large oven-safe skillet over medium-high heat.
Add the chicken and sear for 3 to 4 minutes per side, until golden brown.
You’re not trying to cook it through here. Just building color and flavor.
Step 6: Bake
Preheat your oven to 375°F if you haven’t already.
Transfer the skillet straight into the oven (or pour in the chicken broth first if you want extra pan sauce).
Bake for 20 to 25 minutes, or until the internal temperature hits 165°F.
Step 7: Rest and Serve
Let the chicken rest for 5 minutes before slicing.
This step matters more than people think. Cutting too early means all that filling and juice runs right out onto the cutting board.
Pro Tips
A few things I learned the hard way, so you don’t have to.
- Pound the chicken slightly thinner first. If your breasts are uneven in thickness, they’ll cook unevenly too. A few whacks with a meat mallet fixes that.
- Don’t skip the sear. It only takes a few minutes, but it’s what gives you that golden crust instead of pale, boiled-looking chicken.
- Room temperature cream cheese is non-negotiable. Cold cream cheese doesn’t mix well with the spinach and garlic, and you’ll end up with lumps instead of a smooth filling.
- Use a meat thermometer, always. Chicken breast goes from perfectly juicy to sad and dry in about 90 seconds of overcooking. A thermometer takes the guesswork out completely.
- Let it rest. I know I already said this, but it’s the step people skip most, and it’s the one that saves you from a puddle of filling on your cutting board.
Read this also: Chicken Cordon Bleu: The Fancy Secret That’s Actually Easy
Substitutions and Variations
This recipe is forgiving, which is honestly one of my favorite things about it.
- Cheese swap: Try feta or goat cheese instead of mozzarella for a tangier filling.
- Greens swap: Kale or arugula work in place of spinach if that’s what you have.
- No sun-dried tomatoes? Roasted red peppers add a similar sweetness.
- Bacon lovers: Wrap the stuffed chicken in bacon before searing for extra flavor and a crispier exterior.
- Low carb: This recipe is naturally low carb already, so no changes needed there.
- Dairy free: Swap the cream cheese for a dairy-free cream cheese alternative and use a dairy-free shredded cheese blend.
- Spicy version: Add a pinch of red pepper flakes to the filling for some heat.
Make Ahead Tips
You can stuff the chicken breasts up to 24 hours in advance.
Just cover tightly and store in the fridge until you’re ready to sear and bake.
You can also make the filling by itself up to 3 days ahead. Keep it in an airtight container and stuff the chicken right before cooking.
Good to Know
Nutrition (approximate, per serving):
| Nutrient | Amount |
|---|---|
| Calories | 380 |
| Protein | 42g |
| Fat | 21g |
| Carbohydrates | 5g |
| Fiber | 1g |
These numbers will shift a bit depending on the exact cheese and chicken breast size you use.
Pairing suggestions: This goes really well with roasted asparagus, garlic mashed potatoes, or a simple side salad. If you want to keep it low carb, cauliflower rice is a great option too.
Time-saving tip: Make the filling the night before. It cuts your active cooking time down to about 15 minutes on the day you actually want to eat.
Leftovers and Storage
Stuffed chicken breast keeps well in the fridge for up to 4 days in an airtight container.
To reheat, warm it in a 350°F oven for about 10 minutes, or until heated through. Microwaving works too, but the crust won’t stay crispy.
You can also freeze it, cooked or uncooked, for up to 3 months. If freezing before cooking, thaw completely in the fridge before searing and baking.
FAQs Related to Stuffed Chicken Breast
1. Can I use chicken thighs instead of breasts?
Yes, though thighs are trickier to cut a clean pocket into since they’re smaller and more irregularly shaped. Breasts work best for this method.
2. Why did my filling leak out?
Usually this means the pocket was overstuffed, or the opening wasn’t secured well enough. A toothpick or two goes a long way here.
3. Do I have to sear before baking?
No, but it makes a real difference in flavor and texture. Skipping it means paler, softer chicken with less depth of flavor.
4. Can I grill this instead of baking it?
Yes, though you’ll want to grill over indirect heat so the outside doesn’t burn before the inside cooks through.
5. How do I know when it’s fully cooked?
Internal temperature should read 165°F at the thickest part, checked with a meat thermometer inserted into the meat itself, not the filling.
Wrapping Up
This is one of those recipes that looks like way more effort than it actually is. Golden, cheesy, garlicky, and genuinely simple enough for a random Tuesday night.
Give it a try this week and let me know how it turns out in the comments below. I’d love to hear which variation you went with, or if you’ve got a filling combo of your own that I need to try.