hatch chili queso dip: If you’ve walked past a grocery store parking lot in late August and smelled something smoky and slightly sweet, that’s not a coincidence.
That’s hatch chili season, and it lasts about six weeks a year.
Six. Weeks.
Grocery stores literally roll out giant roasting drums in their parking lots for this pepper. I’m not exaggerating. It’s a whole event.
So when hatch season hits, I don’t mess around. I go straight for queso.
This isn’t the neon-orange stuff from a can. This is a real, melty, smoky, slightly spicy dip that tastes like someone snuck a little bit of New Mexico into your kitchen.
Side Note: If you’ve never had a hatch chili before, think of it as a cousin to the poblano, but with more smoke and a flavor that can swing anywhere from “barely spicy” to “why is my face on fire,” depending on the batch.
Let’s get into it.
What Even Is a Hatch Chili?
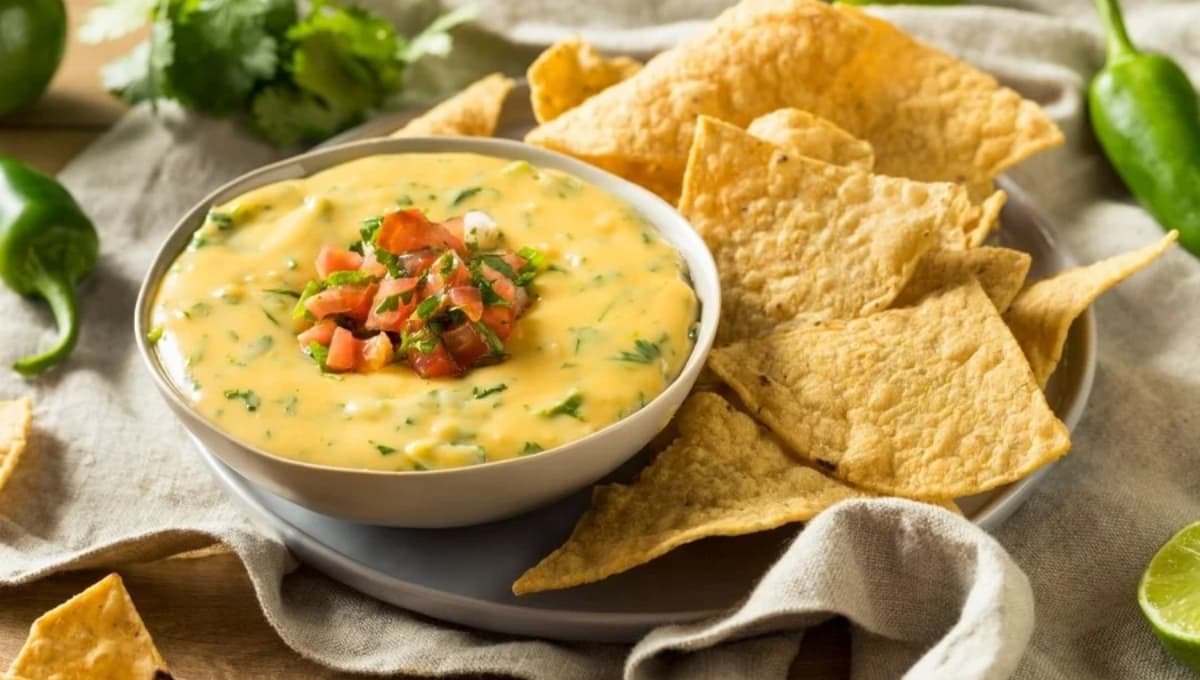
Hatch chilies come from the Hatch Valley in New Mexico. It’s a specific stretch of land, and the soil and climate there apparently do something magical to peppers.
They’re only harvested from late July through September, which is exactly why people go a little feral over them.
Once they’re roasted, their skin gets this deep char and their flavor turns smoky, earthy, and just a little sweet. It’s genuinely unlike any other pepper I’ve cooked with.
Heat-wise, they’re unpredictable. Some batches are mild. Some will absolutely sneak up on you three bites in.
That unpredictability is part of the fun, honestly.
Restaurants in the Southwest build entire menus around this pepper for those six weeks. Some diners plan road trips just to catch peak season. It’s a bigger deal than most people outside the region realize.
Read this also: Kids School Lunches That Actually Come Back Empty
Cooking Time Efficiency
This whole recipe takes about 30 minutes if you’re using canned hatch chilies.
If you’re roasting your own, add another 20 minutes for roasting and steaming the peppers before you even start the queso itself.
My move: I roast a huge batch of hatch chilies at once during peak season, then freeze them in small portions. That way I’ve got that smoky flavor ready to go all year, without needing to hunt down fresh ones in December.
What You’ll Need
| Ingredient | Amount |
|---|---|
| Hatch chilies (fresh, roasted) | 4 medium, or 1 (4 oz) can roasted hatch chilies |
| Block cream cheese | 8 oz, softened |
| Sharp cheddar cheese, shredded | 2 cups |
| Monterey Jack cheese, shredded | 1 cup |
| Whole milk | 1/2 cup |
| Yellow onion, diced | 1/2 cup |
| Garlic cloves, minced | 2 |
| Cumin | 1/2 tsp |
| Chili powder | 1/2 tsp |
| Salt | 1/2 tsp |
| Butter | 1 tbsp |
| Fresh cilantro, chopped | For topping |
| Lime | 1, for squeezing |
Side Note: No fresh hatch chilies near you? Canned roasted hatch chilies work great and are honestly a lifesaver outside of that six-week window.
Tools You’ll Need
- Cast iron skillet or oven-safe skillet
- Cutting board and knife
- Baking sheet (if roasting your own chilies)
- Wooden spoon or silicone spatula
- Small mixing bowl
Pro Tips
1. Roast your own chilies if you can swing it.
The difference between fresh-roasted and canned is real. If your grocery store has that roasting drum going, grab a bag. It takes ten minutes and the smell alone is worth it.
2. Taste your chilies before you commit.
Hatch chilies range from mild to genuinely spicy, and there’s no way to know which one you got until you taste it. I always taste a tiny piece first so I know whether to add more or dial things back.
3. Shred your own cheese.
Pre-shredded cheese has anti-caking agents that mess with how smoothly it melts. Freshly shredded cheese gives you that glossy, stretchy queso texture instead of a grainy one.
4. Low and slow is the move.
Cranking the heat to “melt it faster” is how you end up with a broken, oily mess. Keep it low, stir often, and be patient.
5. Add the milk gradually.
Pour it in a little at a time while stirring. Dumping it all in at once is the fastest way to get a queso that separates.
How to Make Hatch Chili Queso Dip
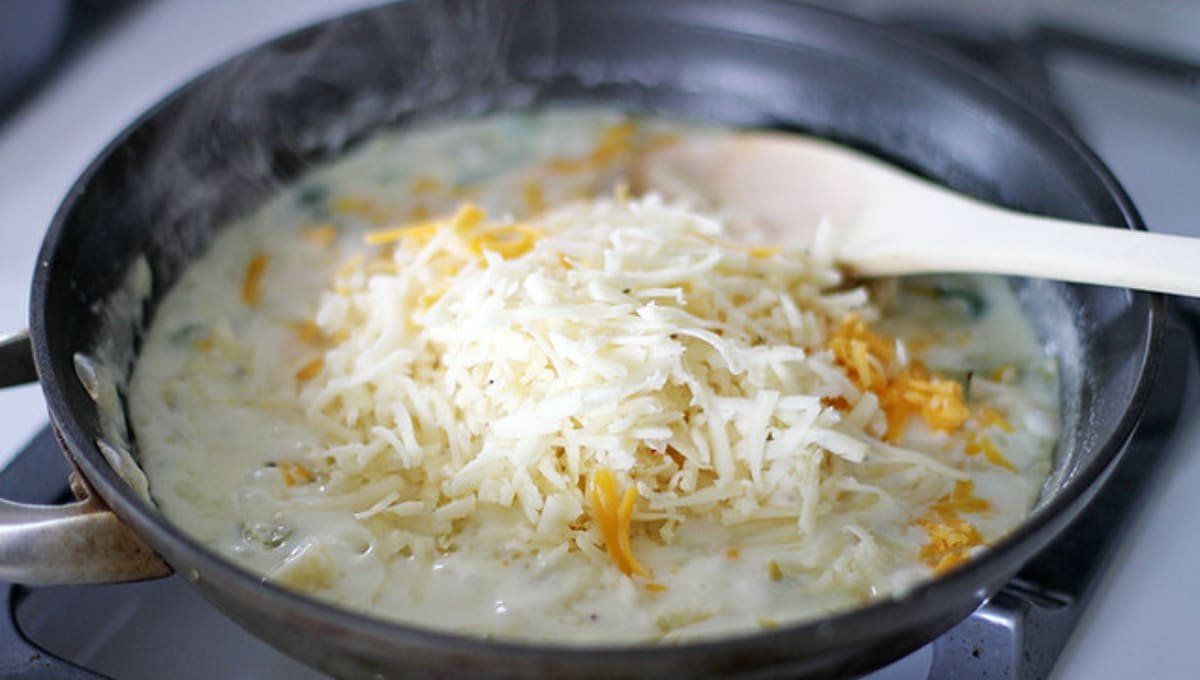
- Roast the chilies (skip this step if using canned). Place fresh hatch chilies on a baking sheet under the broiler for 6 to 8 minutes, turning occasionally, until the skin blisters and blackens. Transfer to a bowl, cover with plastic wrap, and let steam for 10 minutes. Peel off the skin, remove seeds, and dice.
- Cook the aromatics. Melt the butter in your skillet over medium heat. Add the diced onion and cook for 3 to 4 minutes, until soft. Stir in the garlic and cook for another 30 seconds.
- Add the chilies. Toss in your diced hatch chilies, cumin, chili powder, and salt. Stir and let everything cook together for 2 minutes so the flavors can actually talk to each other.
- Lower the heat. Drop the heat down to low. This matters more than it sounds like it would.
- Melt the cream cheese. Add the softened cream cheese in chunks, stirring until fully melted and smooth.
- Bring in the cheddar and Jack. Add the shredded cheeses a handful at a time, stirring after each addition until melted before adding more.
- Stream in the milk. Slowly pour in the milk while stirring constantly, until the queso reaches a smooth, pourable consistency.
- Taste and adjust. This is your moment. Add more salt, more chili powder, or an extra diced chili if you want more heat.
- Top it off. Finish with chopped cilantro and a squeeze of fresh lime juice right before serving.
Read this also: 11 Back to School Dinner Ideas That’ll Actually Save Your Weeknights
Substitutions and Variations
| Original | Substitute | Notes |
|---|---|---|
| Hatch chilies | Poblano peppers | Milder, but similar roasted flavor |
| Cream cheese | Neufchâtel cheese | Lower fat, still creamy |
| Whole milk | Half-and-half | Makes the queso richer |
| Monterey Jack | Pepper Jack | Adds even more heat |
| Cheddar | Queso quesadilla cheese | More authentic melt |
Want it meatier? Brown a half pound of chorizo or ground beef and stir it in at the end.
Want it dairy-light? Swap the cream cheese for a plant-based cream cheese and use oat milk instead of whole milk. It won’t be identical, but it holds up surprisingly well.
Make Ahead Tips
You can prep the roasted, peeled, and diced hatch chilies up to 3 days ahead and store them in an airtight container in the fridge.
The full queso can also be made a day ahead. Reheat it low and slow on the stove, stirring in a splash of milk to bring back that silky texture.
I don’t recommend making the whole thing more than a day in advance though. Reheated cheese sauces start losing their texture the longer they sit.
Leftovers and Storage
Store leftover queso in an airtight container in the fridge for up to 4 days.
To reheat, warm it on the stove over low heat, stirring often and adding a splash of milk as needed. The microwave works too, just heat it in 20-second bursts and stir between each one.
I don’t recommend freezing queso. The dairy tends to separate once thawed, and you’ll end up with a grainy texture no amount of stirring can fix.
Nutritional Snapshot
Per serving (about 1/4 cup), based on 8 servings total
| Nutrient | Amount |
|---|---|
| Calories | ~210 |
| Protein | 9g |
| Fat | 17g |
| Carbohydrates | 4g |
| Sodium | 320mg |
These numbers are estimates and will shift depending on the exact cheeses and milk you use.
What to Serve It With
Queso is basically a blank canvas that happens to be delicious on its own.
- Tortilla chips, obviously
- Grilled chicken or steak, spooned right over the top
- Baked potatoes, as an unconventional but genuinely great topping
- Scrambled eggs, for the most unhinged breakfast of your life
- Fresh veggies, if you want to pretend this is a health food
FAQs Related to Hatch Chili Queso Dip
1. Are hatch chilies actually spicy?
It depends entirely on the batch. Some hatch chilies land around a jalapeño’s heat level, while others can climb closer to a serrano. Taste before you commit.
2. Can I make this in a slow cooker?
Yes. Combine everything except the milk in a slow cooker on low for 1.5 to 2 hours, stirring occasionally, then stir in the milk during the last 15 minutes to loosen it up.
3. Why did my queso turn grainy?
That usually happens when the heat is too high or the cheese was added too fast. Low heat and patience fix almost every queso problem.
4. Can I use frozen hatch chilies?
Yes. Frozen roasted hatch chilies work well. Just thaw and drain any excess liquid before adding them in.
5. What’s the best cheese for queso?
A mix of sharp cheddar for flavor and Monterey Jack for that smooth melt is my go-to combination.
Wrapping Up
Hatch chili season doesn’t stick around long, so if you’ve got fresh ones sitting on your counter right now, this is exactly what they were made for. This queso comes together in under 30 minutes and disappears even faster once it hits the table.
Make it, dip something into it, and let me know in the comments how spicy your batch of chilies turned out. I’m always curious whether people get the mild kind or the ones that fight back.