My grandmother kept a jar of dilly beans in her fridge at all times. Not sometimes. Always. I used to think it was a weird old-lady habit. Then I made my first batch and understood everything.
These are basically pickles, except they’re green beans, and they’re somehow more addictive than the cucumber kind. Crunchy, garlicky, a little spicy if you want them to be, and ready to eat in just a few days.
No canner. No water bath. No standing over a pot for hours. Just beans, brine, and a little patience.
Side Note: If you’ve been intimidated by canning before, this is the easiest possible entry point. We’re doing refrigerator pickles here, not shelf-stable preserving.
What Are Dilly Beans, Exactly?
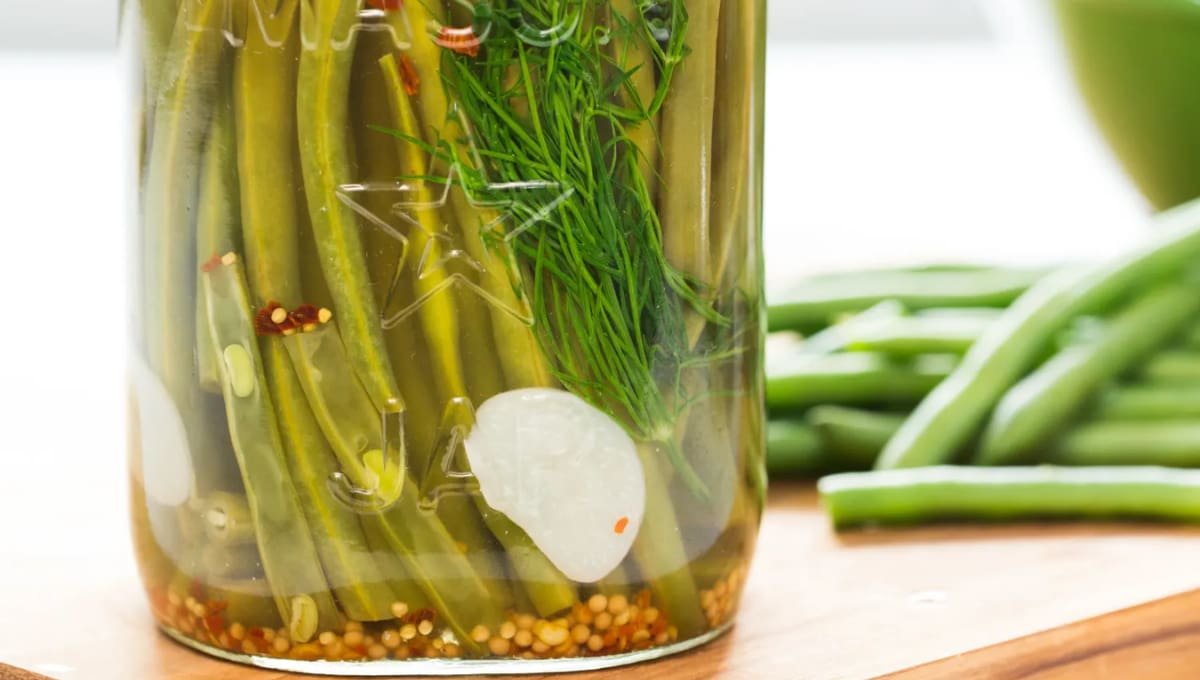
Dilly beans are pickled green beans, usually flavored with dill, garlic, and a bit of heat from red pepper flakes or a whole chili. They started as a way to preserve an overflowing garden harvest, and they turned into one of those snacks people genuinely crave.
You’ll find them on charcuterie boards, tucked into Bloody Marys, or just eaten straight out of the jar standing at the fridge. I’ve made mine dozens of times now, and I’ve landed on a version that’s crisp, punchy, and never mushy.
Read this also: Lunchbox Pinwheels Kids Actually Love Ready in 15 Minutes!
Why You’ll Love This Recipe
- Ready in days, not weeks. These are quick refrigerator pickles, not long-cure canning projects.
- Insanely crunchy. A few tricks in this recipe keep the beans snappy instead of soft.
- Endlessly customizable. Mild for the kids, fiery for you. Same base recipe.
- Great for using up garden beans. If you’ve ever grown green beans, you know how fast they pile up.
What You’ll Need
Ingredients
| Ingredient | Amount |
|---|---|
| Fresh green beans | 1 pound |
| White vinegar | 1 cup |
| Water | 1 cup |
| Kosher salt | 1 tablespoon |
| Garlic cloves, peeled | 4 |
| Fresh dill sprigs | 4 |
| Red pepper flakes | 1 teaspoon (optional) |
| Black peppercorns | 1 teaspoon |
| Mustard seeds | 1 teaspoon (optional) |
Side Note: Grab beans that are firm and thin. Thick, older beans turn out chewier instead of crisp.
Tools
- Two pint-sized mason jars with lids
- Small saucepan
- Sharp knife or kitchen scissors
- Measuring cups and spoons
How to Make Dilly Beans
- Wash and trim your beans. Snap or cut off the stem ends. Leave the pointy tail end alone, it’s just for looks.
- Size them to your jar. Stand a bean up next to the jar and trim it so it sits about half an inch below the rim.
- Pack the jars. Drop 2 garlic cloves, 2 dill sprigs, half the peppercorns, and half the pepper flakes into each jar first.
- Stand the beans up. Pack them in tightly, standing upright, until the jar is full.
- Make the brine. In a saucepan, combine the vinegar, water, and salt. Bring it to a boil, stirring until the salt dissolves.
- Pour it hot. Carefully pour the hot brine over the beans, leaving about half an inch of space at the top.
- Tap out the air. Give the jar a gentle tap on the counter to release any trapped air bubbles.
- Cool, then seal. Let the jars cool to room temperature with the lids on loosely, then tighten and refrigerate.
- Wait it out. Let them sit for at least 48 hours. 5 to 7 days is the sweet spot for real flavor.
Pro Tips From My Kitchen
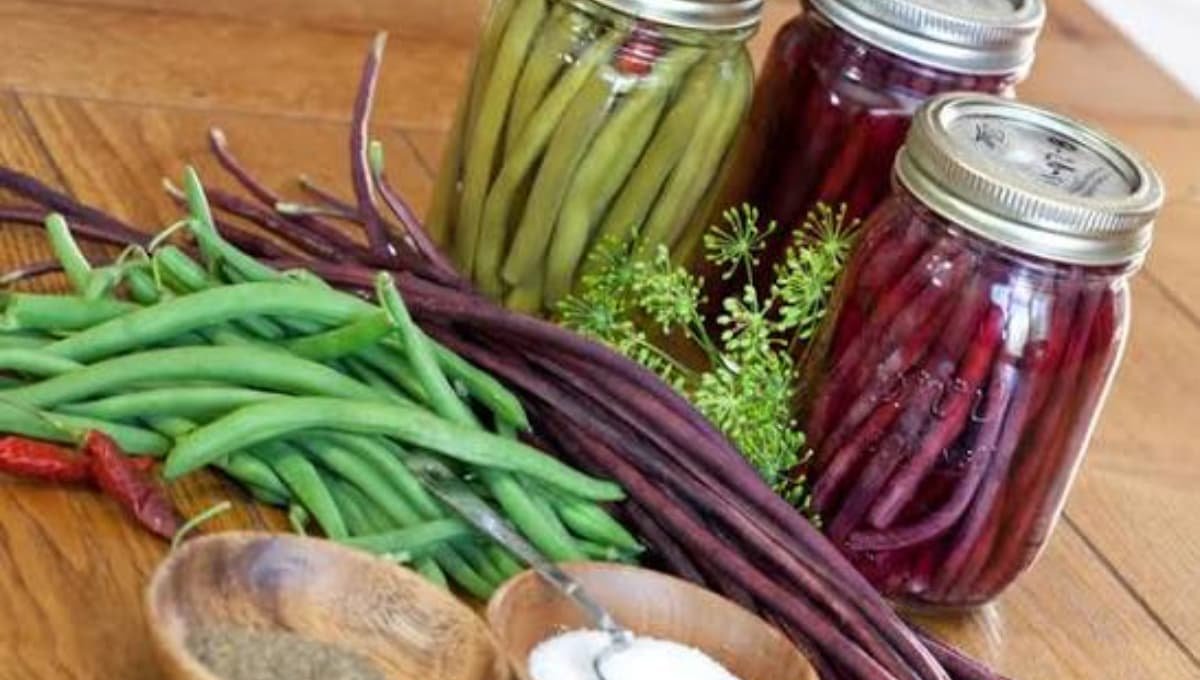
- Blanch for extra crunch. If you want bakery-level crispness, drop the beans in boiling water for exactly 1 minute, then plunge them into ice water before packing the jars.
- Don’t skip the standing position. Packing beans upright instead of stacking them lets the brine flow evenly around every bean.
- Use the freshest beans possible. Beans that have sat in your fridge for a week lose their snap before the pickling even starts.
- Taste test on day 3. Every batch pickles a little differently depending on bean thickness, so start checking early.
- A splash of vodka can help. Half a teaspoon added to the brine is an old preserver’s trick for extra crunch. Totally optional.
Read this aslo: Dirty Cabbage Recipe Low-Carb Cajun 1-Pot Dinner
Substitutions and Variations
| Original | Swap | Result |
|---|---|---|
| White vinegar | Apple cider vinegar | Slightly sweeter, less sharp |
| Fresh dill | 1 tsp dried dill | Still tasty, less bright |
| Red pepper flakes | 1 fresh jalapeño, sliced | More heat, fresher spice |
| Green beans | Yellow wax beans | Same crunch, milder flavor |
| Kosher salt | Pickling salt | Clearer brine, same flavor |
Want them sweeter? Add a tablespoon of sugar to the brine while it boils. It softens the bite of the vinegar without making them taste like candy.
Make Ahead Tips
Dilly beans are basically built to be made ahead. Honestly, they need a few days of sitting time before they’re at their best anyway.
Make a batch on Sunday, and by Wednesday you’ve got a snack ready to grab whenever the craving hits. They also make a great make-ahead gift. Just tie a ribbon around the jar and you’re done.
Leftovers and Storage
Keep your dilly beans in the refrigerator at all times. This recipe is a quick pickle, not a shelf-stable canned good, so it needs to stay cold.
They’ll keep well for 1 to 2 months in the fridge, though mine rarely last that long. Always use a clean fork or tongs to grab beans out of the jar. Double-dipping introduces bacteria that can shorten their shelf life.
Nutritional Snapshot
Per serving (about 8 beans), approximate values:
- Calories: 15
- Carbs: 3g
- Sodium: 290mg
- Fiber: 1g
- Sugar: 1g
These numbers will shift a little depending on how much brine you consume along with the beans.
FAQ Related to
1. Can I can these instead of refrigerating them?
You can, but you’d need a proper water bath canning process with tested ratios for shelf stability. This recipe is written specifically for refrigerator storage.
2. Why are my dilly beans soft instead of crunchy?
This usually comes down to bean freshness or skipping the blanch-and-ice step. Older beans just don’t have the same snap.
3. How long before I can eat them?
Technically 48 hours, but the flavor really develops after 5 days. I know the wait is hard.
4. Can I reuse the brine for a second batch?
I wouldn’t recommend it. The brine loses acidity and flavor strength after the first use, which affects both taste and safety.
5. Do I have to use fresh dill?
No, dried dill works fine. Fresh just gives you a brighter, more herbal flavor.
Wrapping Up
There’s a reason these jars used to sit in every farmhouse fridge across the country. They’re simple, they’re cheap to make, and once you try one, you’ll understand exactly why my grandmother never let hers run empty.
Give this recipe a try this week, and let me know in the comments how yours turned out. I’d love to hear if you went mild or spicy, and if you’ve got any tricks of your own for keeping that crunch.