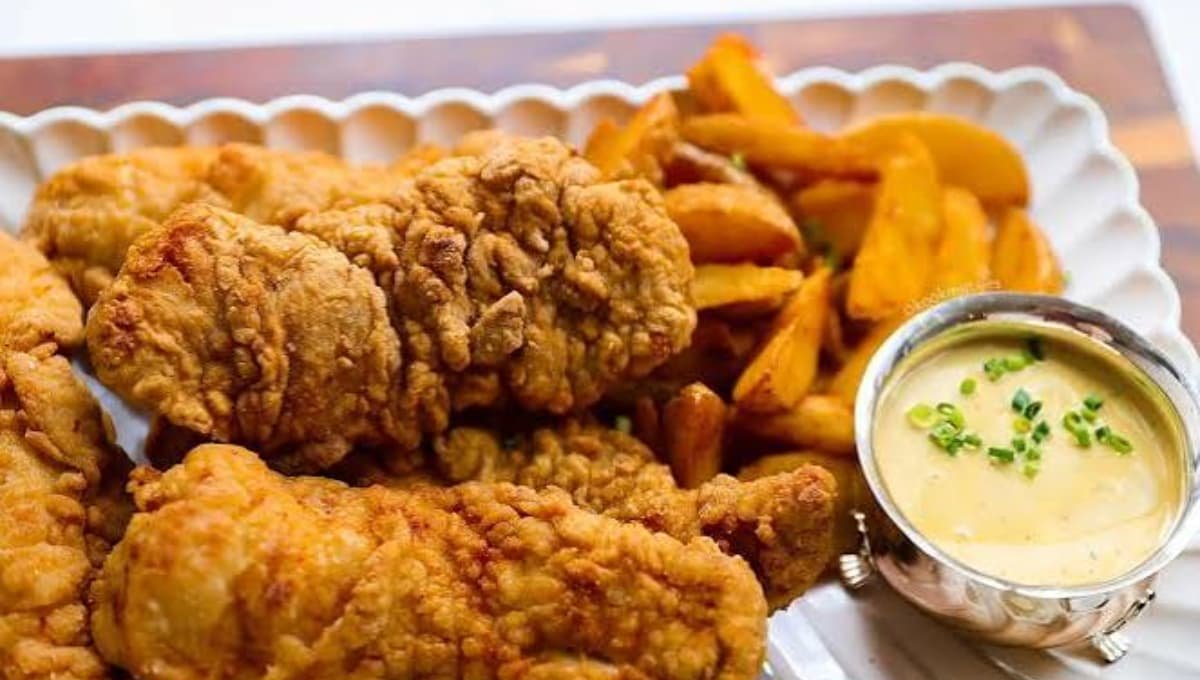
Homemade Crispy Chicken Tenders ruined takeout for me. Completely. For years, mine came out pale and a little sad. The coating would slide right off the chicken on the first bite, like it had somewhere better to be.
Silas ate them anyway, bless him. But more than once I caught him scrolling a fast food menu on his phone under the table.
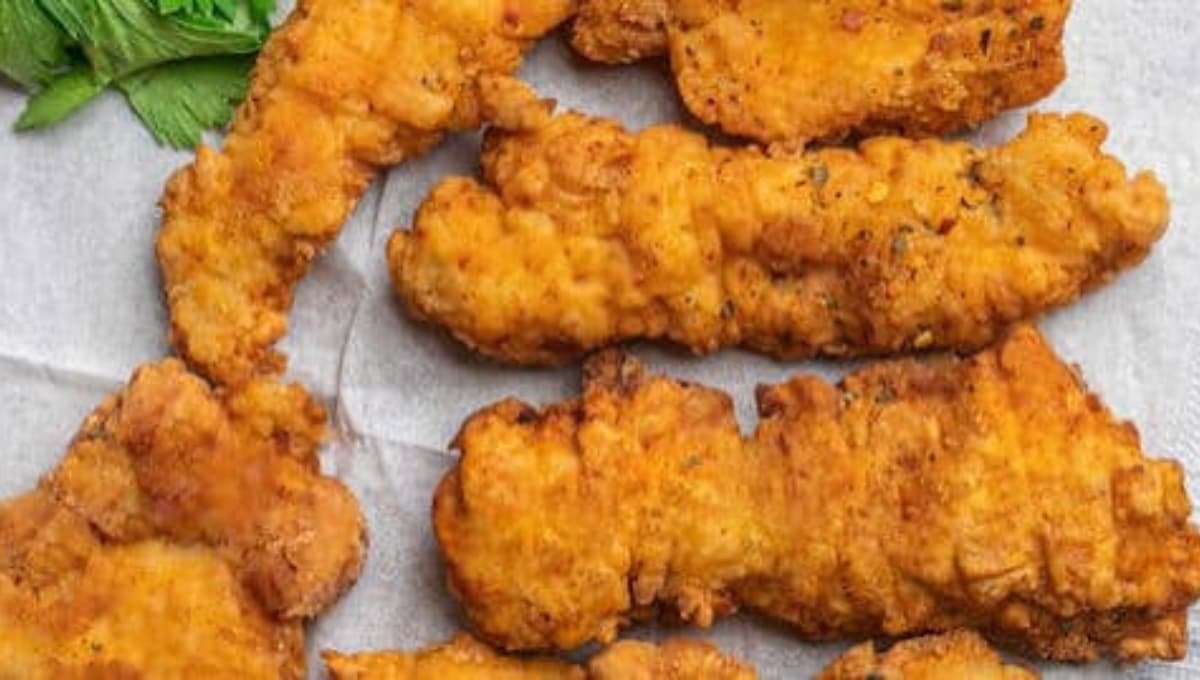
Then I changed three small things. The next batch came out deep golden, super craggy, and so loud you could hear the crunch from the next room. Silas put his phone face down. That’s how I knew.
Below, I’m sharing those three changes, plus the sneaky mistake most people make in the 30 seconds after their tenders leave the oil. It’s why so many homemade tenders go soggy, and the fix costs nothing.
Why These Chicken Tenders Turn Out So Crispy
Great fried chicken isn’t luck. It’s a little kitchen science, and all of it is simple enough for a Tuesday night.
- Buttermilk brine: The mild acid and salt season the chicken deep inside and keep it juicy.
- Cornstarch in the flour: It has no gluten, so the crust stays light and crisp instead of bready.
- A pinch of baking powder: It forms tiny bubbles in the hot oil for a lighter, shattery crunch.
- Shaggy flour bits: Buttermilk rubbed into the dredge makes little clumps that fry into the crunchy nooks everyone fights over.
- A short rest: Ten minutes on a rack helps the breading grip the chicken like glue.
Side Note: Here’s a fact that honestly surprised me. Every chicken has only two tenderloins, one tucked under each side of the breast. It’s its own slim strip of muscle, which is why tenders cook in just a few minutes.
What You’ll Need
Nothing fancy here. Most of this is probably sitting in your pantry right now.
| Ingredient | Amount | Why It’s Here |
|---|---|---|
| For the Brine | ||
| Chicken tenderloins | 1 ½ lbs (about 12 pieces) | The star of the show |
| Buttermilk | 1 cup plus 3 tablespoons, divided | Tenderizes and seasons the chicken |
| Hot sauce | 1 tablespoon (optional) | Adds flavor with very little heat |
| Kosher salt | 1 teaspoon | Seasons the meat from the inside |
| For the Crispy Coating | ||
| All-purpose flour | 1 ½ cups | The base of the crust |
| Cornstarch | ½ cup | Extra crunch |
| Baking powder | 1 teaspoon | Light, bubbly texture |
| Garlic powder | 2 teaspoons | Savory depth |
| Smoked paprika | 2 teaspoons | Golden color and a hint of smoke |
| Onion powder | 1 teaspoon | Rounds out the flavor |
| Black pepper | 1 teaspoon | A gentle bite |
| Kosher salt | 1 ½ teaspoons | Seasons the crust |
| Cayenne pepper | ½ teaspoon (optional) | A little warmth |
| For Frying and Finishing | ||
| Peanut, canola, or vegetable oil | About 4 to 6 cups | Enough for 1 inch of oil in your pot |
| Flaky sea salt | A pinch | Sprinkled on the second they come out |
Tools for the Job
- Large bowl or zip-top bag for brining
- Shallow dish or pie plate for the flour mixture
- Whisk for mixing the brine and the coating
- Two wire racks and two sheet pans, one set for resting the raw coated chicken and one for draining the cooked tenders
- Heavy-bottomed pot or Dutch oven
- Instant-read or clip-on thermometer
- Tongs or a spider strainer
If you only grab one tool from this list, make it the thermometer. It’s the difference between golden tenders and tenders that are burnt outside and raw inside. I learned that one the hard way, with Silas watching.
Read this also: These Hot Honey Brussels Sprouts Turned My Husband Into a Fan
Pro Tips for First-Timers
- Skip the paper towels. This is the sneaky mistake I mentioned. Paper towels trap steam under hot chicken and turn the bottom soggy in minutes. Drain your tenders on a wire rack so air can flow all the way around them.
- Watch the oil, not the clock. Aim for 350°F. The temperature dips as soon as the chicken goes in, so nudge your burner up or down to keep it between 325°F and 350°F.
- Fry in small batches. Four or five tenders at a time is plenty. A crowded pot cools the oil fast, and cool oil means greasy chicken.
- Press, don’t roll. Press the flour onto the chicken firmly with your palm so every bump and crevice gets covered.
- Salt them hot. Flaky salt sticks perfectly to tenders fresh out of the oil. Wait five minutes, and it just slides right off.
How to Make Crispy Chicken Tenders
Step 1: Brine the Chicken
In a large bowl, whisk together 1 cup of buttermilk, the hot sauce, and 1 teaspoon of kosher salt. Add the chicken and toss until every piece is coated.
Cover and refrigerate for at least 1 hour, or up to overnight. I love the overnight route because the chicken gets extra juicy and dinner is half done before I’ve even started.
Side Note: See that thin white tendon at one end of each tenderloin? You can trim it off before brining. It’s safe to eat, but it can turn a little chewy once fried.
Step 2: Mix the Coating
In a shallow dish, whisk the flour, cornstarch, baking powder, garlic powder, smoked paprika, onion powder, black pepper, 1 ½ teaspoons of salt, and cayenne, if using.
Now drizzle the remaining 3 tablespoons of buttermilk over the flour. Rub it in with your fingertips until you see little pea-sized clumps. These clumps are where that craggy, extra-crunchy crust comes from.
Step 3: Coat the Tenders
Lift one tender out of the brine and let the extra buttermilk drip off for a second. Lay it in the flour and press firmly on both sides so the coating really sticks.
Set it on a wire rack over a sheet pan and repeat with the rest. Let them rest for 10 to 15 minutes.
You’ll notice the coating turning slightly damp and pasty in spots. Good! That means the breading has grabbed on tight and won’t abandon ship in the fryer.
Step 4: Heat the Oil
While the tenders rest, pour about 1 inch of oil into your heavy pot or Dutch oven. Heat it over medium-high until it reads 350°F.
Leave at least 2 inches between the oil and the rim, because it bubbles up fast. And never walk away from hot oil, not even for a quick phone check.
Step 5: Fry in Batches
Gently lower 4 or 5 tenders into the oil, laying each one away from you so any splash goes the other way. Fry for 4 to 6 minutes, flipping once halfway, until they’re deep golden brown.
They’re done when the thickest part reads 165°F inside. That’s the USDA’s safe temperature for chicken, so don’t skip the check.
Step 6: Drain and Season
Move the cooked tenders to the clean wire rack and sheet pan. Sprinkle them with flaky salt right away.
To keep batches warm, slide the rack into a 200°F oven while you fry the rest. They’ll hold their crunch for about 20 minutes.
Then comes the hardest step of all: not eating them straight off the rack. Silas has never once passed this test.
Read this also: Air Fryer Salmon Bites That Turned a Salmon Hater Into a Fan
Substitutions and Variations
Out of something? Want to switch things up? This recipe bends without breaking.
| Instead Of | Try This | Good to Know |
|---|---|---|
| Buttermilk | 1 cup milk + 1 tablespoon lemon juice or white vinegar | Let it sit 5 minutes until slightly thick |
| Chicken tenderloins | Chicken breast cut into ¾-inch strips, or boneless thighs | Thighs stay extra juicy but may need another minute |
| All-purpose flour | 1:1 gluten-free flour blend | Pick a blend with xanthan gum for better grip |
| Cornstarch | Potato starch or rice flour | Both give a similar crunch |
| Peanut oil | Canola, vegetable, or sunflower oil | Any neutral oil with a high smoke point works |
| Smoked paprika | Sweet paprika | Same color, a little less smoky |
Air Fryer Chicken Tenders
Coat and rest the tenders the same way. Spray them well with oil on both sides, especially any dry, floury spots, until they look damp.
Air fry at 400°F for 10 to 12 minutes, flipping halfway, until they hit 165°F inside. They won’t be quite as craggy as the fried ones, but they still crunch like crazy.
Flavor Twists
- Nashville hot: Whisk ¼ cup melted butter with 1 tablespoon cayenne, 1 teaspoon brown sugar, and ½ teaspoon garlic powder. Brush it over the hot tenders and serve with pickles.
- Honey hot: Warm 3 tablespoons of honey with 2 tablespoons of hot sauce and toss the fried tenders in it.
- Lemon pepper: Swap the black pepper for 2 teaspoons of lemon pepper seasoning, cut the coating salt to 1 teaspoon, and finish with lemon zest.
Make-Ahead Tips
- Brine the night before. It’s the easiest head start you’ll ever give yourself.
- Mix the dry coating up to a week ahead. Keep it in an airtight jar and add the buttermilk drizzle right before coating.
- Fry now, freeze for later. Cool the tenders completely, freeze them in a single layer on a sheet pan, then move them to a freezer bag. Homemade frozen tenders beat the boxed kind every time.
Leftovers and Storage
Fridge: Cool the tenders completely, then store them in an airtight container for up to 3 to 4 days.
Freezer: They keep their best flavor and texture for up to 3 months.
Reheating: Use the air fryer at 375°F for 4 to 6 minutes, or the oven at 400°F for about 10 minutes. From frozen, give them 8 to 10 minutes in the air fryer or 12 to 15 minutes in the oven. Either way, heat them until they’re steaming hot in the middle.
Please keep them far away from the microwave. It turns that gorgeous crust into something closer to a wet sponge. I tried it once so you never have to.
Leftovers make a killer lunch, too. Chop them over a Caesar salad or roll them into a wrap with ranch and lettuce.
Nutrition Snapshot
These are estimates for one serving (about 3 tenders). Real numbers depend on your brands and how much oil the coating soaks up.
| Nutrient | Per Serving (approx.) |
|---|---|
| Calories | 450 |
| Protein | 42 g |
| Carbohydrates | 23 g |
| Fat | 19 g |
| Fiber | 1 g |
| Sodium | 650 mg |
Easy Swaps for Different Diets
- Gluten-free: Use a 1:1 gluten-free flour blend. Cornstarch is naturally gluten-free, but double-check the labels on your baking powder and hot sauce.
- Dairy-free: Make “buttermilk” with unsweetened plain oat or soy milk and a tablespoon of lemon juice.
- Lighter: Go with the air fryer version above.
What to Serve with Chicken Tenders
A good tender deserves a good dip. My go-to honey mustard is 3 tablespoons each of mayo, Dijon mustard, and honey, plus a squeeze of lemon. Ranch, BBQ, and sweet chili never let us down either.
For sides, you can’t go wrong with:
- Crispy fries or potato wedges
- Creamy coleslaw for a cool contrast
- Baked mac and cheese for full comfort mode
- Corn on the cob or a simple green salad
Side Note: Get the fries in the oven first, then fry the tenders while they bake. Everything lands on the table hot at the same time.
FAQs Related to Chicken Tender
1. Why does the breading fall off my chicken tenders?
Usually it’s one of three things. The coating wasn’t pressed on firmly, the tenders didn’t rest before frying, or they got moved around too soon in the oil. Press hard, rest for 10 minutes, and wait a full minute before touching them in the pot.
2. Can I make chicken tenders without buttermilk?
Yes! Stir 1 tablespoon of lemon juice or white vinegar into 1 cup of milk and let it sit for 5 minutes. It works almost exactly like the real thing.
3. What is the best oil for frying chicken tenders?
Peanut oil is a classic pick thanks to its high smoke point and clean taste. Canola and vegetable oil work great too and usually cost less. If anyone you’re feeding has a peanut allergy, skip peanut oil to be safe.
4. How do I know when chicken tenders are done?
Use a thermometer. The thickest part should read 165°F, and the outside should be a deep golden brown.
5. What’s the difference between chicken tenders and chicken strips?
True tenders come from the tenderloin under the breast, while strips are usually sliced breast meat. Both work great here.
6. How long should chicken soak in buttermilk?
At least 1 hour, with overnight being ideal. Past 24 hours, the meat can start to turn a little mushy.
Conclusion
Once you hear that first crunch, there’s no going back to pale, soggy tenders. These are golden, juicy, packed with flavor, and made with simple stuff you already have.
Brine them tonight, fry them tomorrow, and watch them disappear faster than you can set the table.
When you make them, come back and leave a comment. Tell me which dip won at your house, or if you went the air fryer route. Got a question before you start? Drop it below too, I read every single one.