
I used to have a rule. No baking after 9 PM. That rule lasted about two weeks before I broke it for the first time, standing in my kitchen in socks, digging through the pantry for something, anything, chocolate.
That’s the night I made my first mug cake. And honestly, it changed how I think about dessert.
No preheating an oven for 20 minutes just to bake one slice worth of cake. No dishes piling up either, since it’s just one mug and a fork when you’re done.
Mug cakes are exactly what they sound like. A cake, made in a mug, in the microwave, in under two minutes. No oven. No mixer. No waiting around for anything to cool before you can eat it.
This one is rich, fudgy in the middle, and comes together with ingredients you probably already have sitting in your cabinet right now.
Side Note: If you’ve tried mug cakes before and ended up with something rubbery or dry, that’s usually a measuring problem, not a recipe problem. I’ll walk you through exactly where people go wrong.
What You’ll Need
Here’s everything that goes into this recipe. Nothing fancy, nothing you need to hunt down at a specialty store.
| Ingredient | Amount |
|---|---|
| All-purpose flour | 4 tablespoons |
| Granulated sugar | 3 tablespoons |
| Unsweetened cocoa powder | 2 tablespoons |
| Baking powder | 1/4 teaspoon |
| Salt | A pinch |
| Milk | 3 tablespoons |
| Vegetable oil | 2 tablespoons |
| Vanilla extract | 1/4 teaspoon |
| Chocolate chips | 1 tablespoon (optional, but recommended) |
That’s it. Nine ingredients, most of them already sitting in your baking cabinet.
Read this also: Why Is Everyone Suddenly Obsessed With Keto Fat Bombs?
Tools You’ll Need
- A microwave-safe mug (12 ounces or larger, so the cake has room to rise)
- A small bowl or the mug itself for mixing
- A fork or small whisk
- Measuring spoons
You genuinely don’t need anything else. No stand mixer, no electric hand mixer, not even a proper mixing bowl if you’re okay stirring directly in the mug.
How to Make a Mug Cake
Step 1: Mix the dry ingredients. In your mug, whisk together the flour, sugar, cocoa powder, baking powder, and salt. Make sure there are no cocoa clumps hiding at the bottom. This matters more than you’d think.
Step 2: Add the wet ingredients. Pour in the milk, oil, and vanilla extract. Stir until the batter is smooth and no dry streaks remain. It should look glossy and pourable, similar to pancake batter.
Step 3: Fold in the chocolate chips. If you’re using them, stir the chocolate chips into the batter now. This is what gives you those little melty pockets in the finished cake.
Step 4: Microwave. Microwave on high for 70 to 90 seconds. Every microwave is different, so start checking at 70 seconds. The cake is done when the top looks set but still slightly moist in the very center.
Step 5: Let it rest. Let the mug sit for one minute before eating. It’ll be dangerously hot straight out of the microwave, and the texture actually firms up a bit as it cools.
Pro Tips From Someone Who’s Made Way Too Many of These
- Don’t overmix the batter. Once the dry and wet ingredients come together, stop stirring. Overmixing activates the gluten in the flour, and that’s what leads to a chewy, rubbery texture instead of a soft crumb.
- Measure your flour correctly. Scoop the flour with a spoon into your measuring spoon and level it off with a knife. If you just dig the spoon straight into the bag, you’ll pack in extra flour and end up with a dense, dry cake.
- Watch the time closely. Microwave wattages vary a lot. A 1200-watt microwave will cook this faster than a 700-watt one. Start at 70 seconds and add 10-second increments until it’s just set.
- Use a wide mug, not a tall skinny one. Wide mugs let heat distribute more evenly, so the cake cooks through without the edges turning tough before the center is done.
- Slightly undercook it. The center should look a little glossy when you pull it out. Carryover heat finishes the cooking as it rests, and this is the difference between a fudgy cake and a dry one.
Substitutions and Variations
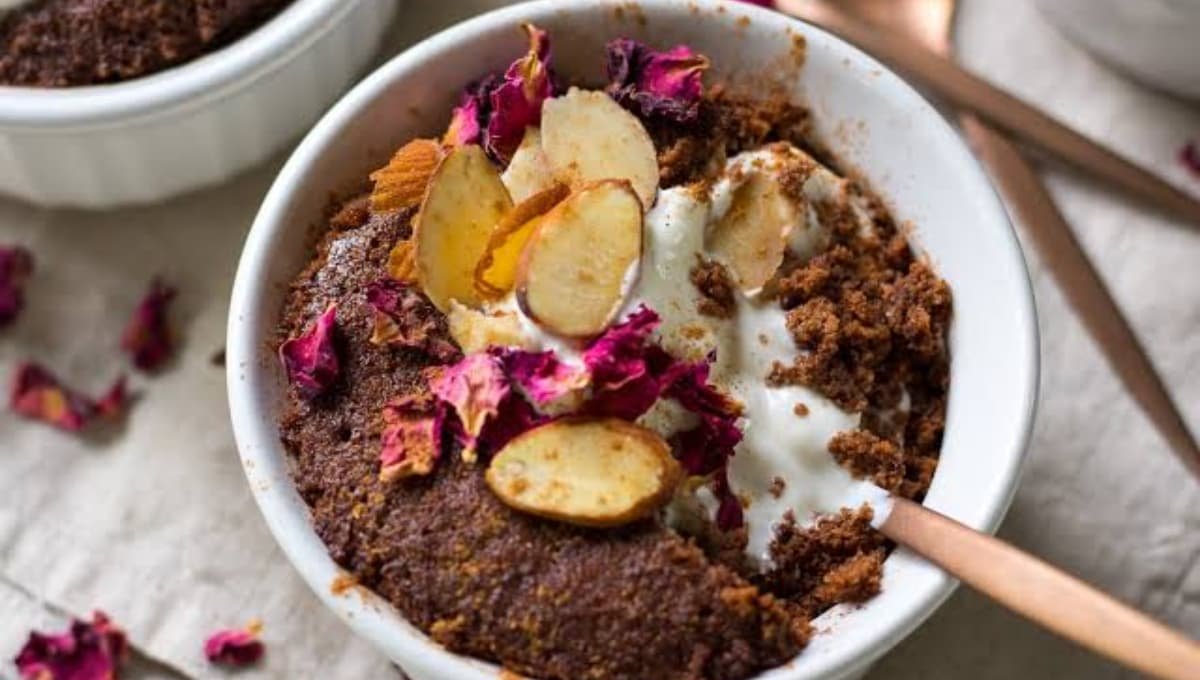
This recipe is easy to bend to whatever you’ve got on hand or whatever craving you’re chasing.
| Original | Swap | Notes |
|---|---|---|
| All-purpose flour | Gluten-free 1:1 flour blend | Works well, texture stays similar |
| Vegetable oil | Melted butter | Adds richness, slightly denser texture |
| Milk | Any plant-based milk | Oat or almond milk both work great |
| Granulated sugar | Brown sugar | Adds a deeper, caramel-like flavor |
| Chocolate chips | Peanut butter chips or white chocolate chips | Great flavor twist |
| Cocoa powder | 2 extra tablespoons flour + espresso powder | Turns this into a coffee mug cake instead |
For a peanut butter version, drop a spoonful of peanut butter into the center of the batter right before microwaving. It sinks in and creates a gooey center pocket.
For a funfetti version, skip the cocoa powder, add an extra tablespoon of flour, and stir in a tablespoon of sprinkles.
Read this also: This 3 Ingredient Keto Bread Is Pure Magic!
Additional Details Worth Knowing
Nutritional snapshot (per mug cake, made with the base recipe):
| Nutrient | Approximate Amount |
|---|---|
| Calories | 390 |
| Carbohydrates | 48g |
| Fat | 19g |
| Protein | 6g |
| Sugar | 26g |
These numbers will shift a bit depending on which substitutions you use, especially with the milk and oil.
Diet-friendly swaps:
- Dairy-free: Use oat milk or almond milk in place of regular milk.
- Egg-free: This recipe is already egg-free, which is part of why it’s so simple.
- Lower sugar: Cut the sugar down to 2 tablespoons and skip the chocolate chips. It’ll be less sweet but still satisfying.
Meal pairing suggestions: This is a dessert through and through, so pair it with a scoop of vanilla ice cream, a dollop of whipped cream, or a drizzle of caramel sauce. A hot cup of coffee or chai on the side rounds it out nicely for a cozy night in.
Time efficiency tip: Keep a small jar pre-mixed with the dry ingredients (flour, sugar, cocoa, baking powder, salt) in your pantry. When a craving hits, you only have to add the wet ingredients and you’re microwaving within 30 seconds of deciding you want cake.
Make Ahead Tips
You can pre-measure the dry ingredients and store them in a small jar or zip-top bag for up to a month. This turns the whole process into a 90-second job from start to finish, since you skip the measuring step entirely.
I wouldn’t recommend mixing the wet and dry ingredients ahead of time, though. The batter is best made fresh right before microwaving, since it doesn’t hold well once combined.
Leftovers and Storage
Mug cakes are really built for eating right away, but if you somehow end up with leftovers, here’s what to do.
Storage: Cover the mug with plastic wrap and store at room temperature for up to a day, or in the fridge for up to three days.
Reheating: Pop it back in the microwave for 15 to 20 seconds to warm it through. It won’t be exactly like fresh, but it’s still good.
Freezing: I don’t recommend freezing mug cakes. The texture gets noticeably worse once thawed, and honestly, this recipe takes so little time that it’s easier to just make a fresh one when the craving hits again.
FAQs Related to Mug Cake
1. Can I make a mug cake without a microwave?
Yes, though it takes longer. Bake it in an oven-safe mug at 350°F for about 15 to 18 minutes, or until a toothpick comes out mostly clean.
2. Why did my mug cake overflow?
Your mug was probably too small, or the microwave ran too long, causing the batter to rise too fast and spill over the sides. Stick with a 12-ounce mug or larger and check the cake early.
3. Why is my mug cake rubbery?
This almost always comes down to overmixing or overcooking. Stir just until combined, and pull the cake out while the center still looks slightly glossy.
4. Can I double this recipe?
You can, but it’s better to make two separate mugs rather than one giant one. A bigger mug of batter cooks unevenly in the microwave, leaving you with a dry outside and an undercooked center.
5. Is this recipe kid-friendly to make?
Very much so. There’s no oven involved, no sharp tools needed, and the whole process takes under five minutes from start to finish, which makes it a great first recipe for kids to help with.
6. Why does my mug cake taste eggy or bitter even without eggs?
This usually points to too much baking powder. A little goes a long way in a recipe this small, so stick to the 1/4 teaspoon called for here. Too much and you’ll pick up a slightly metallic, bitter aftertaste.
7. Can I use a coffee mug instead of a proper baking mug?
Yes, as long as it’s microwave-safe and holds at least 12 ounces. Avoid mugs with metallic paint or trim, since those aren’t safe for the microwave and can cause sparking.
Conclusion
This mug cake has genuinely saved me from more than one 9 PM dessert emergency, and I have a feeling it’s about to do the same for you.
It’s fast, it’s fudgy, and it uses stuff you already have in your kitchen. Once you’ve got the base recipe down, playing around with the substitutions and flavor swaps is where the real fun starts.
Give it a try tonight, and drop a comment below letting me know how yours turned out. If you tried any of the variations, I’d love to hear which one you’re going back for next.