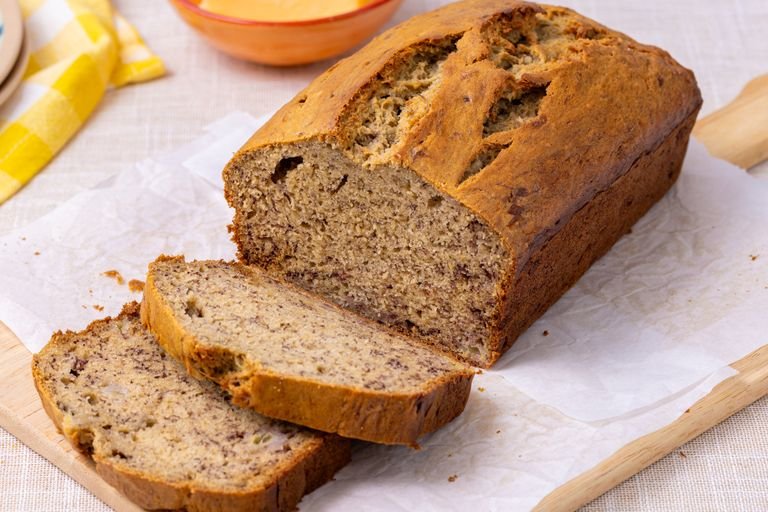
Is it weird that I’ve made this exact loaf over 40 times?
I started counting after the third batch this year, and honestly, the number is a little embarrassing. But once you try it, you’ll get it.
This is the banana bread I make when the bananas on my counter go from yellow to spotted to “okay these are basically compost now.” It’s soft, it’s rich, and it’s got that deep caramel-y flavor that only comes from bananas that are too ripe for anything else.
No fancy equipment. No weird ingredients. Just one bowl, one loaf pan, and about ten minutes of actual work.
Let’s get into it.
What You’ll Need
Here’s everything going into this loaf:
- 3 ripe bananas (the spottier, the better)
- 1/3 cup melted butter
- 3/4 cup sugar (brown sugar works too, and it’s honestly even better)
- 1 egg, beaten
- 1 teaspoon vanilla extract
- 1 teaspoon baking soda
- Pinch of salt
- 1 1/2 cups all-purpose flour
That’s it. Eight ingredients and you probably have most of them sitting in your kitchen right now.
Tools You’ll Need
- One large mixing bowl
- A fork or potato masher
- A loaf pan (9×5 inch is the standard)
- A whisk or wooden spoon
- Measuring cups and spoons
- Parchment paper or non-stick spray
Pro Tips
I’ve made enough mistakes with this recipe to save you from making them too.
1. Use bananas that look almost too far gone. If you’re hesitating about whether they’re too brown, they’re not. The uglier the peel, the sweeter and more flavorful the bread.
2. Don’t overmix the batter. Once the flour goes in, stir just until you don’t see dry streaks anymore. Overmixing activates the gluten and gives you a dense, chewy loaf instead of a soft one.
3. Melt your butter and let it cool slightly. If it’s too hot, it’ll start cooking the egg when you mix them together. Nobody wants scrambled egg bits in their banana bread.
4. Test with a toothpick, not a timer. Every oven runs a little different, so start checking around the 55-minute mark instead of trusting the clock completely.
5. Let it cool in the pan for 10 minutes before removing it. I learned this one the hard way after a loaf fell apart on me mid-transfer.
Substitutions and Variations
This recipe is forgiving, which is part of why I make it so often.
| Original | Swap | Notes |
|---|---|---|
| All-purpose flour | Whole wheat flour | Slightly denser, more fiber |
| Butter | Coconut oil | Adds a light coconut flavor |
| Sugar | Honey or maple syrup | Use 1/2 cup instead of 3/4 cup |
| Egg | Flax egg | 1 tbsp ground flax + 3 tbsp water |
| Plain | Add-ins | Walnuts, chocolate chips, or cinnamon |
If you want to get a little wild, add a swirl of peanut butter through the batter before baking. I did this once on a whim and now I can’t go back.
How to Make It
- Preheat your oven to 350°F (175°C). Grease your loaf pan or line it with parchment paper.
- Mash the bananas. In a large bowl, mash the 3 bananas with a fork until mostly smooth. A few small lumps are fine.
- Mix in the wet ingredients. Stir in the melted butter, sugar, beaten egg, and vanilla extract until combined.
- Add the dry ingredients. Sprinkle the baking soda and salt over the mixture, then stir it in. Add the flour and mix just until combined.
- Pour into the pan. Transfer the batter to your prepared loaf pan and smooth the top with a spatula.
- Bake for 55 to 65 minutes. The bread is done when a toothpick inserted into the center comes out clean or with just a few moist crumbs.
- Cool before slicing. Let it rest in the pan for 10 minutes, then transfer to a wire rack to cool completely (or at least mostly, because let’s be real, nobody waits that long).
Make Ahead Tips
You can prep this one ahead in a couple of ways:
- Mash and freeze the bananas up to 2 months in advance, then thaw before using.
- Mix the dry ingredients the night before and store in an airtight container so all you have to do in the morning is combine everything and bake.
- Bake the full loaf a day ahead. Banana bread actually tastes better on day two once the flavors settle.
Leftovers and Storage
This bread stays good for a surprisingly long time if you store it right.
- Room temperature: Wrap tightly in plastic wrap or foil and keep for up to 3 days.
- Fridge: Store in an airtight container for up to a week. It’ll firm up a bit, but a quick 10-second zap in the microwave brings it right back.
- Freezer: Slice it first, then freeze individual pieces wrapped in plastic. It’ll keep for up to 3 months, and you can pull out a slice whenever the craving hits.
FAQ
Why did my banana bread sink in the middle? This usually happens from underbaking or opening the oven door too early. Give it the full bake time and resist peeking for the first 40 minutes.
Can I use frozen bananas? Yes. Just thaw them completely first and drain off any excess liquid before mashing.
Why is my loaf dense instead of fluffy? Overmixing is almost always the cause. Stir just until the flour disappears into the batter.
Can I double this recipe? You can, but bake it in two separate pans rather than one large one, or the center won’t cook through properly.
Do I need a stand mixer for this? Not at all. This is a one-bowl, hand-mixed recipe from start to finish.
Wrapping Up
Next time your bananas start looking a little too spotty for snacking, you’ll know exactly what to do with them.
This loaf is simple enough for a weeknight and good enough that people will ask if you bought it from a bakery. I still make a batch almost every other week, and I don’t see that changing anytime soon.
Give it a try this week and let me know how it turns out in the comments. And if you experiment with any fun add-ins, I genuinely want to hear about it.