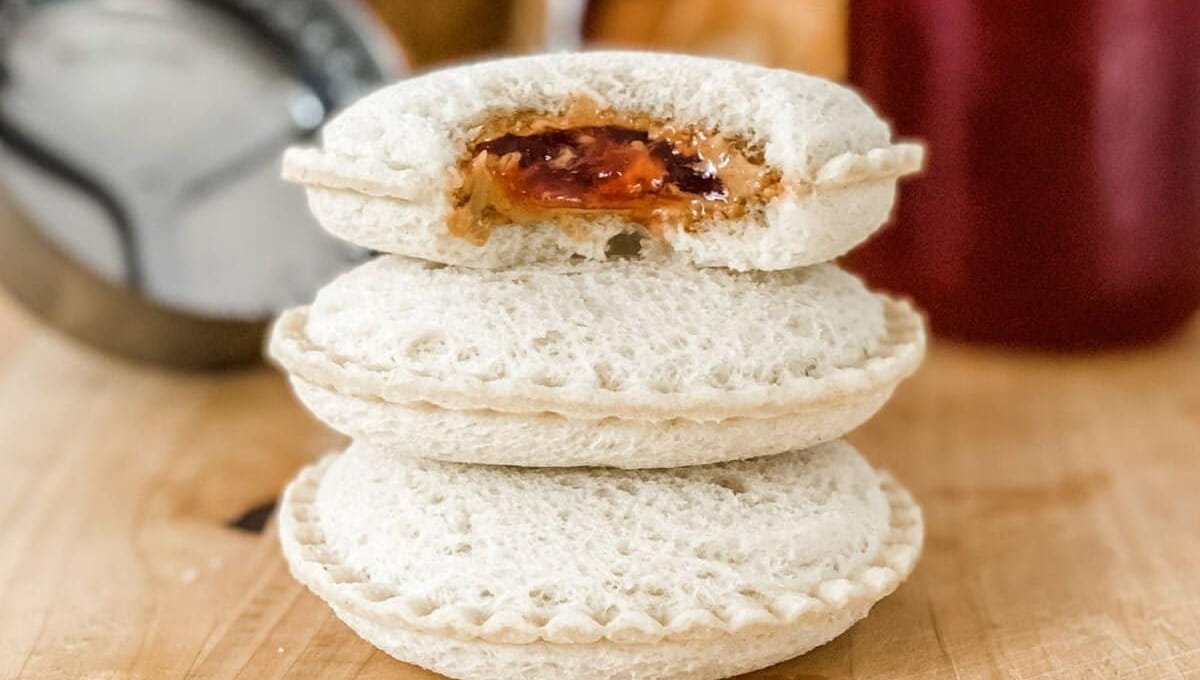
Homemade Uncrustables: My nephew went through a solid year where he would only eat five foods. Plain pasta, chicken nuggets, goldfish crackers, apple slices (no skin, obviously), and the crust-free PB&J pockets from the freezer aisle.
That last one is what saved his lunchbox on school mornings when my sister had zero energy left to negotiate with a six year old.
Eventually she started making them herself, and honestly, once I tried her version, I understood the hype. They taste way better fresh, they cost a fraction of the store bought ones, and you control exactly what goes inside.
So if you’ve got a kid who refuses anything “weird” looking on their sandwich, this recipe is basically foolproof. It’s soft, sealed shut so nothing leaks, and freezer-friendly, which means you can make a whole batch on a Sunday and just grab one on your way out the door all week.
Side Note: These work with sunbutter, cookie butter, or Nutella too if peanut allergies are a concern at your kid’s school.
What actually surprised me the most is how simple the process is. There’s no fancy sealing tool, no special dough, and nothing that requires a trip to a specialty store.
It’s just bread, a jar of peanut butter, a jar of jelly, and a few minutes at the counter. Once you’ve made one batch, the whole thing becomes muscle memory.
I also love that this is one of those recipes where kids can actually help. Mine likes pressing the fork around the edges, which keeps her occupied for a solid ten minutes while I get the rest of lunch packed.
What You’ll Need
| Ingredient | Amount |
|---|---|
| Sandwich bread (soft, sliced) | 2 slices per pocket |
| Creamy peanut butter | 2 tablespoons per pocket |
| Jelly or jam (grape or strawberry work best) | 1 tablespoon per pocket |
| Unsalted butter, melted (optional, for sealing) | 1 teaspoon |
This recipe scales easily. If you’re making a full freezer batch, just multiply everything by however many sandwiches you want. I usually do a dozen at once so I’m not thinking about lunch for two weeks straight.
Read this also: The Secret to Irresistible Chicken Pot Pie Casserole
Tools You’ll Need
- A round biscuit cutter or a wide-mouth mason jar lid (about 3.5 to 4 inches)
- A rolling pin
- A small offset spatula or butter knife
- A fork for crimping the edges
- Parchment paper
- Freezer-safe bags or an airtight container
Pro Tips
1. Roll the bread flat first. Press a rolling pin over each slice before assembling. This makes the edges seal so much easier and keeps the filling from squishing out the sides.
2. Keep the jelly away from the edges. Spread peanut butter all the way to the border, but leave a half inch gap with the jelly. It stops leaks better than anything else I’ve tried.
3. Press hard when sealing. Use a fork and really push down around the entire circle. A weak seal is the number one reason these fall apart in a lunchbox.
4. Freeze them flat before bagging. Lay them on a tray for an hour first. If you stack them right away, they’ll stick together and the edges can crack.
5. Trim the crust after sealing, not before. It’s way easier to cut a clean edge once the sandwich is already pressed shut.
6. Use bread that’s a day or two old. Fresh-out-of-the-bag bread is a little too soft and tends to tear when you roll it flat. Bread that’s sat out overnight holds together much better.
None of these tips are complicated, but they’re the difference between a sandwich that survives a backpack and one that shows up as a sad, leaky mess at lunchtime.
How to Make Homemade Uncrustables
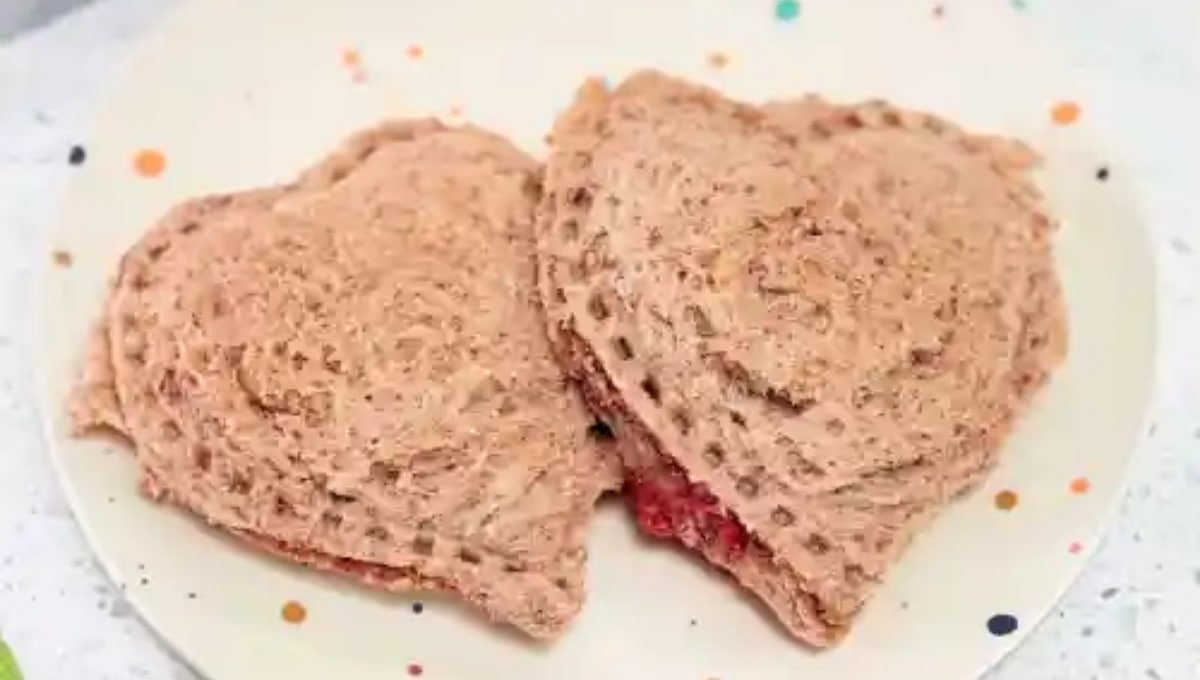
Step 1: Flatten your bread. Take two slices of bread and roll each one flat with a rolling pin. This makes them easier to seal and gives you that classic soft, dense texture.
Step 2: Cut your circles. Use your biscuit cutter or jar lid to cut a circle out of each slice. Save the scraps for breadcrumbs or just eat them while you cook, no judgment here.
Step 3: Spread the peanut butter. Spread peanut butter evenly across one circle, going all the way to the edge.
Step 4: Add the jelly. Spoon the jelly into the center, staying about a half inch away from the border.
Step 5: Top and seal. Place the second bread circle on top. Press the edges together firmly with your fingers first, then go around the whole circle with a fork to crimp it shut.
Step 6: Optional butter brush. Brush a thin layer of melted butter around the sealed edge. This helps it toast up golden if you want to pan sear it, and it also adds a little extra hold.
Step 7: Freeze or serve. Lay finished pockets flat on a parchment-lined tray and freeze for an hour before transferring to a freezer bag. Or eat one fresh right away, no judgment there either.
Why Homemade Beats the Freezer Aisle Box
I did the math once out of curiosity, and it’s not even close. A box of eight store bought pockets runs somewhere around five to six dollars, which works out to over half a dollar per sandwich before you even factor in shipping or store markups.
Making them at home with a loaf of bread, a jar of peanut butter, and a jar of jelly costs a fraction of that per sandwich, and you get way more than eight out of one batch.
The bigger win for me is the ingredient list. Store bought versions often have added preservatives to survive months in a freezer aisle. Homemade ones use whatever’s already in your kitchen, so you know exactly what’s going into your kid’s lunchbox.
Read this also: The Chocolate Chip Muffin Trick Bakeries Don’t Share
Substitutions & Variations
| Original | Swap | Why It Works |
|---|---|---|
| Peanut butter | Sunbutter or almond butter | School-safe for nut allergies |
| Grape jelly | Strawberry, raspberry, or honey | Same texture, different flavor |
| Sandwich bread | Whole wheat or gluten-free bread | Fiber boost or celiac-friendly |
| PB&J filling | Nutella and banana slices | Sweet dessert-style version |
| PB&J filling | Ham and cheese | Savory version for lunch variety |
Make-Ahead Tips
This recipe is basically built for making ahead. I make a big batch every couple weeks so there’s always something ready for a rushed morning.
Assemble the pockets fully, freeze them flat on a tray, then transfer to a labeled freezer bag once solid. They’ll keep well for up to three months.
Pack one straight from the freezer into a lunchbox in the morning. It thaws by lunchtime and doubles as a mini ice pack for whatever else is in there.
If you want to speed up prep even more, freeze the peanut butter and jelly bread circles separately before assembling, then just stack and crimp them the morning you need one. It’s a good option if freezer space is tight and you can’t fit a full tray of finished sandwiches at once.
Storage & Reheating
Freezer pockets stay good for 2 to 3 months stored in an airtight freezer bag with the air pressed out.
If you’ve already made a batch and want to eat within a few days instead, they’ll keep in the fridge for about 3 days in a sealed container.
There’s no reheating needed. Just let it sit out or in a lunchbox for a couple hours and it thaws naturally by the time lunch rolls around.
Nutritional Snapshot
These numbers are approximate and will shift a bit depending on your bread and jelly brand.
| Nutrient | Per Sandwich (approx.) |
|---|---|
| Calories | 260 |
| Protein | 8g |
| Carbohydrates | 32g |
| Fat | 11g |
| Sugar | 12g |
What to Pair With It
A single pocket sandwich is filling but it’s still just bread, nut butter, and jelly, so I like rounding out the lunchbox with something fresh.
- Apple slices or grapes
- Baby carrots with ranch
- A small yogurt cup
- Pretzels or whole grain crackers
- A cheese stick for extra protein
I usually rotate between these so lunch doesn’t feel repetitive, even though the sandwich itself stays the same. A quick swap between grapes one day and carrots the next is enough to keep a picky eater from getting bored of the routine.
If your kid has a school that allows a small treat, a couple of chocolate chips or a mini granola bar rounds things out without going overboard on sugar.
FAQs Related to Homemade Uncrustables
1. Can I make these gluten-free?
Yes. Swap in a soft gluten-free sandwich bread. It’s a little more delicate to roll, so go slow when flattening it.
2. Why did my sandwich leak in the freezer?
Usually it’s jelly too close to the edge, or the seal wasn’t pressed firmly enough with the fork. Give the fork crimp an extra pass around the whole circle.
3. Can I use crunchy peanut butter instead?
You can, but creamy spreads more evenly and seals better against the bread. Crunchy tends to poke small holes in the crust while you’re pressing it shut.
4. How long do they take to thaw?
About 2 to 3 hours at room temperature, which lines up almost perfectly with a normal school day.
5. Can toddlers eat these?
Yes, just cut into smaller wedges for little hands and keep an eye out for choking hazards with thicker jelly spreads.
6. Do I need to cut off the crust?
No, the biscuit cutter already removes the crust when you cut out the circle. That’s actually where the edges get their smooth, sealed look.
7. Can I pack these without freezing them first?
Absolutely. You can make one fresh in under five minutes if you’re not planning ahead. They just won’t have that cool, slightly firm texture kids seem to love from the frozen version.
Conclusion
Once you make these yourself, it’s genuinely hard to go back to the store bought box. They taste fresher, they’re cheaper per sandwich, and you get to pick the bread and fillings that actually match what your kid will eat.
Make a batch this weekend and stash them in the freezer. Future-you on a rushed Tuesday morning will be thankful.
Let me know in the comments if you tried a different filling combo, or if your picky eater has any other lunchbox requests I should turn into a recipe next.