I used to think bakery style muffins were some kind of professional secret. Tall domed tops, soft centers, chocolate chips in every single bite. Meanwhile mine always came out flat and a little sad, like a cupcake that gave up halfway through.
Turns out the trick isn’t fancy equipment or a culinary degree. It’s a few small habits most recipes never bother explaining.
I started making these chocolate chip muffins on repeat this year, mostly because my kitchen turned into a testing ground after one too many dry, crumbly batches from other recipes. This version fixed all of that.
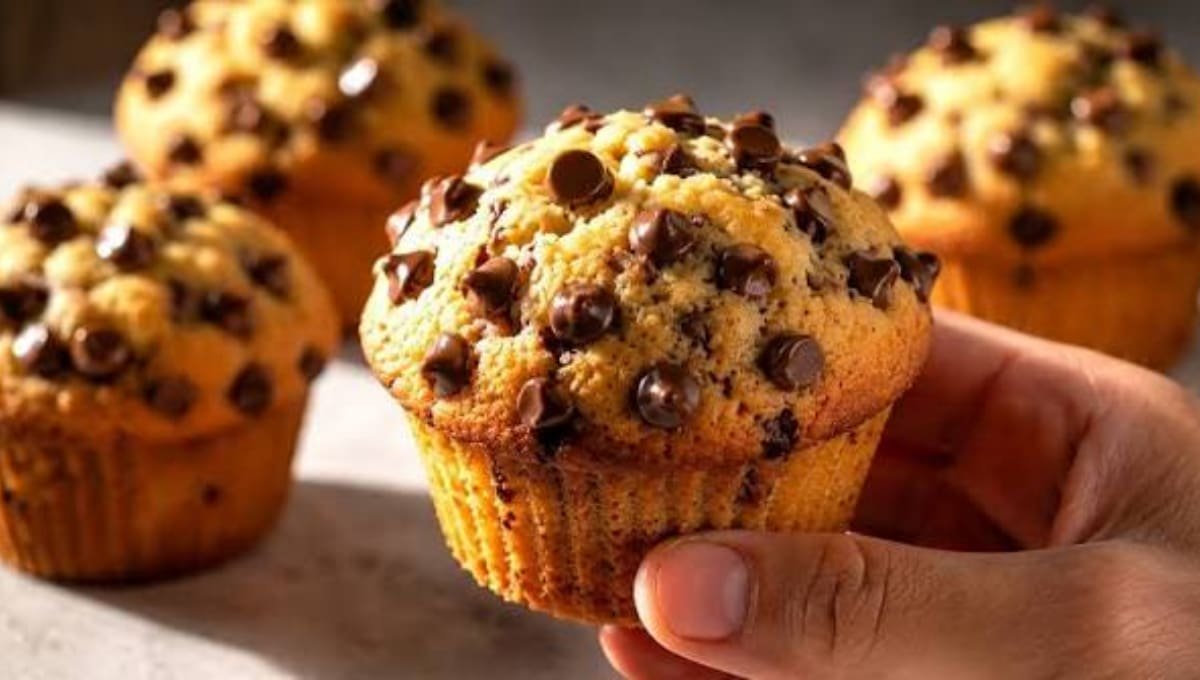
They’re rich without being heavy, sweet without tipping into dessert territory, and the tops get that shiny, crackly muffin top everyone fights over.
Side Note: If you’ve ever pulled muffins out of the oven and wondered why they look nothing like the bakery photo, the answer is almost always oven temperature and overmixing. More on that below.
I actually kept a little notebook next to my mixing bowl for a few weeks, jotting down what changed between batches. Sounds excessive, I know. But once I saw the pattern (hot oven start, generous batter, minimal stirring) it stopped feeling like guesswork and started feeling like a formula I could repeat every single time.
Now this is the version I hand off to anyone who asks how to make muffins that actually look like they came from a bakery case. No weird tricks, just a handful of habits that make a real difference.
What You’ll Need
| Ingredient | Amount |
|---|---|
| All-purpose flour | 2 1/2 cups |
| Granulated sugar | 3/4 cup |
| Brown sugar, packed | 1/4 cup |
| Baking powder | 2 1/2 tsp |
| Baking soda | 1/4 tsp |
| Salt | 3/4 tsp |
| Eggs, large | 2 |
| Whole milk | 1 cup |
| Unsalted butter, melted | 1/2 cup |
| Vegetable oil | 1/4 cup |
| Vanilla extract | 2 tsp |
| Semi-sweet chocolate chips | 1 1/2 cups, plus extra for topping |
Side Note: Room temperature eggs and milk matter more than people think. Cold ingredients tighten up the batter and you lose some of that fluffy rise.
Read this also: Buffalo Chicken Meatballs: The Football Appetizer Everyone Fights Over
Tools You’ll Need
- Large mixing bowl
- Medium mixing bowl
- Whisk
- Rubber spatula
- Muffin tin (standard 12-cup)
- Paper liners or nonstick spray
- Ice cream scoop or large cookie scoop
- Cooling rack
Pro Tips
- Don’t overmix the batter. Stir until the flour just disappears. Lumpy batter is exactly what you want here. Overmixed batter builds gluten, and that’s what turns muffins tough and rubbery instead of soft.
- Start hot, then drop the temperature. Baking at 425°F for the first 5 minutes forces the tops up fast, then dropping to 350°F for the rest lets the inside finish cooking without burning the outside. This is the actual secret behind those tall bakery domes.
- Fill the cups generously. Bakery muffins look huge because the batter is filled almost to the top of the liner, not two-thirds full like most home recipes suggest. Don’t be shy with the scoop.
- Save some chocolate chips for the top. Pressing a few extra chips onto each muffin right before baking gives you that “loaded with chocolate” look you see in bakery displays.
- Let them rest 10 minutes in the pan. Pulling muffins out too early can cause the bottoms to steam and turn soggy. A short rest firms them up before they hit the cooling rack.
Step-by-Step Instructions
Step 1: Prep your pan and oven. Preheat the oven to 425°F. Line a 12-cup muffin tin with paper liners or grease it well.
Step 2: Mix the dry ingredients. In a large bowl, whisk together the flour, granulated sugar, brown sugar, baking powder, baking soda, and salt.
Step 3: Mix the wet ingredients. In a separate bowl, whisk the eggs, milk, melted butter, oil, and vanilla until smooth.
Step 4: Combine. Pour the wet mixture into the dry ingredients. Stir gently with a spatula until just combined. A few streaks of flour are fine.
Step 5: Fold in the chocolate chips. Add the chocolate chips and fold them through with just a few strokes. Overworking the batter here undoes all the softness you’re going for.
Step 6: Fill the muffin cups. Scoop the batter into the liners, filling them almost to the top. Press a few extra chocolate chips onto each one.
Step 7: Bake. Bake at 425°F for 5 minutes, then without opening the oven door, lower the temperature to 350°F and bake for another 14 to 16 minutes, until a toothpick comes out clean or with just a few moist crumbs.
Step 8: Cool. Let the muffins sit in the pan for 10 minutes, then transfer them to a cooling rack.
Side Note: Resist eating one straight out of the oven. I know it’s hard. Give them a few minutes and the texture actually improves.
Substitutions and Variations
| Original | Swap | Notes |
|---|---|---|
| Semi-sweet chocolate chips | Dark or milk chocolate chips | Adjust sweetness to preference |
| Whole milk | Buttermilk | Adds tang, extra soft crumb |
| Vegetable oil | Melted coconut oil | Slight coconut flavor |
| All-purpose flour | 1:1 gluten-free flour blend | Texture will be slightly denser |
| Plain muffins | Add 1 tsp cinnamon | Warms up the flavor |
| Chocolate chips | Chopped walnuts or pecans (half) | Adds crunch and nutty flavor |
You can also turn these into a mini version by using a mini muffin tin. Just cut the bake time down to around 10 to 12 minutes total.
Make Ahead Tips
The batter can be made the night before and kept covered in the fridge. Let it sit at room temperature for 10 minutes before scooping, since cold batter won’t rise as well.
You can also portion the batter into the muffin tin, cover it, and freeze it unbaked. Bake straight from frozen, adding about 5 extra minutes to the bake time.
Read this also: The Sourdough bread Recipe That Fixed My “Hockey Puck” Loaves
Storage and Reheating
Store cooled muffins in an airtight container at room temperature for up to 3 days.
For longer storage, keep them in the fridge for up to a week, or freeze them for up to 3 months.
To reheat, microwave a muffin for 15 to 20 seconds, or warm it in a 300°F oven for about 8 minutes if it’s coming straight from the freezer.
Nutritional Snapshot
Per muffin, based on 12 servings
| Nutrient | Amount |
|---|---|
| Calories | ~310 |
| Carbohydrates | 42g |
| Protein | 5g |
| Fat | 14g |
| Sugar | 21g |
Side Note: These numbers will shift depending on the chocolate chip brand and any substitutions you make.
Meal Pairing Suggestions
- A hot cup of coffee or a cold brew for breakfast
- Fresh berries on the side for a lighter brunch spread
- A glass of cold milk, because some pairings never go out of style
- Scrambled eggs and fruit if you want to round it into a full breakfast
FAQs Related to Chocolate Chip Muffin
1. Why did my muffins come out flat?
This usually happens when the oven wasn’t hot enough at the start, or the batter sat too long before baking. The first blast of high heat is what pushes the tops up.
2. Can I use a hand mixer instead of whisking by hand?
You can, but keep it on low speed and stop as soon as everything is combined. A hand mixer makes it easy to overmix without realizing it.
3. Do I have to use paper liners?
No. A well greased muffin tin works fine. Liners just make cleanup and removal easier.
4. Can I reduce the sugar?
You can cut the granulated sugar by about 2 tablespoons without changing the texture much. Any more than that and the muffins may turn out slightly dense.
5. Why did the bottoms turn soggy?
This is almost always from pulling the muffins out of the pan too early. Let them rest in the tin for the full 10 minutes before moving them.
6. Can I make these into a loaf instead of individual muffins?
Yes. Pour the batter into a greased 9×5 loaf pan and bake at 350°F for about 50 to 55 minutes, checking with a toothpick near the end.
7. Why do bakery muffins taste richer than homemade ones?
A lot of it comes down to using both butter and oil in the same batter. Butter brings flavor, oil keeps the crumb soft even after the muffins cool, and combining the two gets you closer to that bakery texture.
Conclusion
These chocolate chip muffins turned into one of those recipes I keep coming back to, mostly because they actually deliver on that bakery style look without needing bakery equipment or a long ingredient list.
The hot start, generous fill, and a few extra chips on top do most of the heavy lifting. Everything else is just basic muffin batter you probably already know how to make.
I’ve handed this recipe to a few friends now, and the feedback is always some version of “these taste like the ones from the coffee shop.” That’s really the whole goal here. Bakery quality, homemade effort.
Make a batch this weekend and let me know how the tops turned out in the comments. If you tried any of the substitutions, or turned them into a loaf, I’d love to hear how it worked out too.