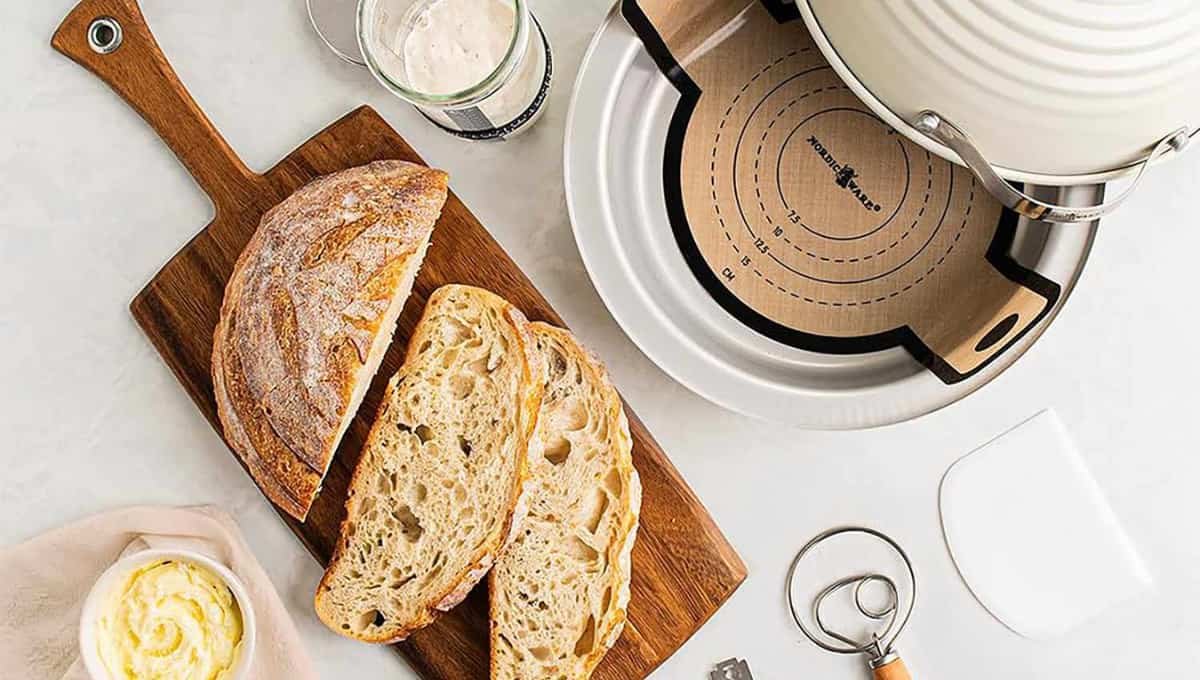
Sourdough bread Recipe: My starter and I had a rocky start. Actual rocky, like a hockey puck. The first loaf I ever pulled out of my oven could have doubled as a doorstop. Dense center, pale crust, zero rise. I nearly gave up on sourdough completely and went back to store-bought bread like a quitter.
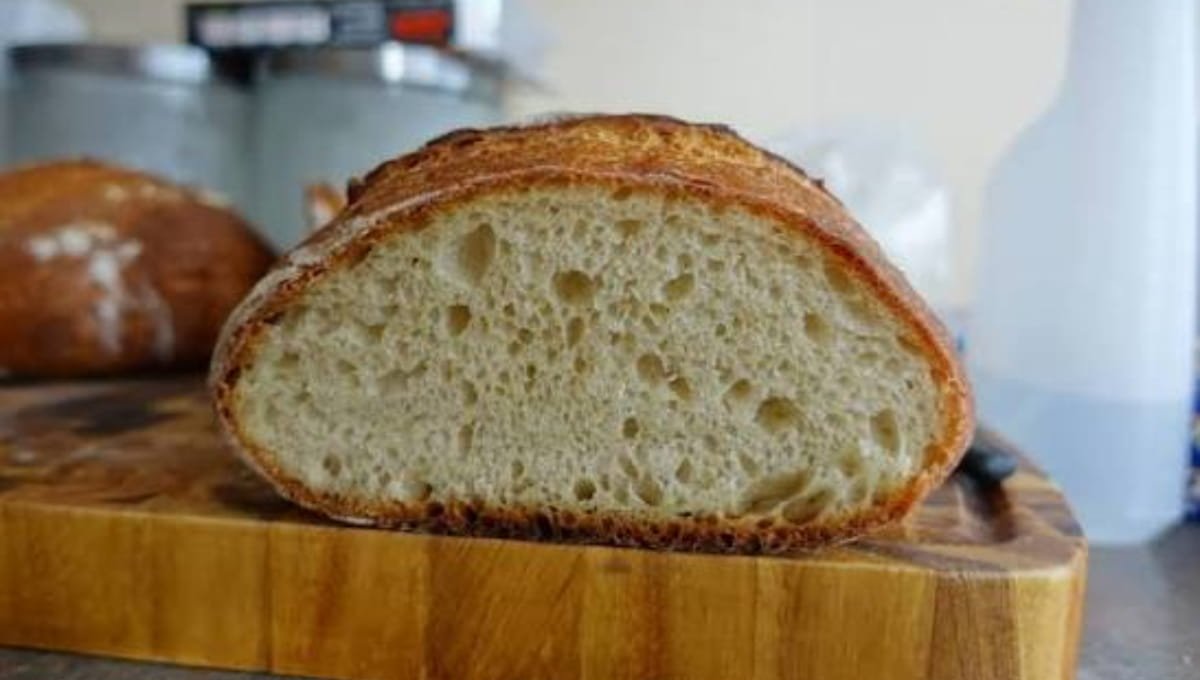
But I didn’t. I kept feeding that jar of goop on my counter, kept reading, kept baking bad loaves, and eventually cracked the code. Now I make this bread almost every week, and it comes out with a crackly crust, an open, airy crumb, and that tangy flavor that makes people ask if I bought it from a fancy bakery.
This recipe is the exact one I use. No weird tricks, no professional equipment required, just a method that’s forgiving enough for beginners and reliable enough that I still use it years later.
A lot of sourdough tutorials make this bread sound like a science experiment run by someone with a lab coat and a metronome. It’s not. Once you understand the rhythm of it, mix, fold, wait, shape, wait some more, bake, it becomes almost automatic. Your hands start knowing what the dough should feel like before your brain catches up.
The other thing nobody tells you is how loud sourdough is when it comes out of the oven. Mine crackles and pops on the counter for a good ten minutes after baking. The first time it happened I genuinely thought something had gone wrong. Turns out that’s just the crust cooling and settling, and it’s one of my favorite parts of the whole process now.
Side Note: You’ll need an active sourdough starter for this. If you don’t have one yet, that’s a separate project (give yourself about a week), but once it’s alive and bubbly, this recipe is yours to keep forever.
What You’ll Need
| Ingredient | Amount |
|---|---|
| Active sourdough starter | 100g (about ½ cup) |
| Warm water | 375g (about 1½ cups) |
| Bread flour | 500g (about 4 cups) |
| Fine sea salt | 10g (about 2 tsp) |
| Rice flour (for dusting) | A few tablespoons |
That’s it. Five ingredients and one of them is water.
Read this also: Heart-Healthy Baked Lemon Garlic Salmon: The 15-Minute Recipe That Doesn’t Taste Like “Diet Food”
Tools
- Large mixing bowl
- Kitchen scale (this one matters, more on that below)
- Bench scraper
- Banneton or a bowl lined with a clean kitchen towel
- Dutch oven with a lid
- Sharp razor blade or a small, sharp knife
- Parchment paper
Pro Tips
1. Weigh your ingredients. Cups and spoons are fine for casseroles, but bread is chemistry. A kitchen scale costs less than a fancy coffee and it’s the single biggest reason my bread stopped being a hockey puck.
2. Your starter should float. Drop a spoonful in a glass of water before you start. If it floats, it’s ready to bake with. If it sinks, give it another feeding and wait a few more hours.
3. Don’t rush the bulk ferment. This is where all the flavor and structure happens. A warm kitchen speeds it up, a cold one slows it down. Watch the dough, not the clock.
4. Cold dough is easier to score. Scoring room temperature dough is like trying to cut through pudding. Straight from the fridge, it’s clean and controlled.
5. Steam is not optional. That crackly crust comes from trapped steam in the first part of baking. The Dutch oven does this job for you, and it’s the easiest shortcut in this whole recipe.
6. Temperature changes everything. A 75°F kitchen and a 68°F kitchen will give you two very different fermentation times. If your house runs cold, your oven with just the light on can work as a gentle proofing box.
Step-by-Step Instructions
Mix the Dough
In a large bowl, combine the warm water and active starter. Stir until the starter dissolves a bit into the water.
Add the bread flour and mix with your hands or a spatula until no dry patches remain. It’ll look shaggy and a little ugly. That’s normal.
Cover the bowl and let it rest for 30 to 60 minutes. This is called the autolyse, and it just lets the flour fully hydrate.
Add Salt and Fold
Sprinkle the salt over the dough along with a splash of water. Pinch and fold it in until it’s fully incorporated.
Bulk Fermentation
This next part takes 4 to 6 hours at room temperature, sometimes longer depending on your kitchen.
Every 30 minutes for the first two hours, do a set of stretch and folds. Grab one side of the dough, stretch it up, and fold it over itself. Rotate the bowl and repeat on all four sides.
After the folding sets are done, just let the dough sit and rise. You’re looking for it to grow by about 50%, with some bubbles visible on the surface.
Shape the Loaf
Turn the dough out onto a lightly floured surface. Shape it into a round by tucking the edges underneath, creating tension on top.
Dust your banneton with rice flour and place the dough in it, seam side up.
Read this also: This Buffalo Chicken Pasta Ruined Wing Night for Me Forever
Cold Proof
Cover the banneton and pop it in the fridge for 12 to 18 hours. This slow, cold rise is what builds the tangy sourdough flavor everyone loves.
Bake
Preheat your oven to 475°F with the Dutch oven inside for at least 30 minutes.
Flip the dough out onto a piece of parchment paper. Score the top with your blade in one confident slash.
Carefully lower the dough (with the parchment) into the hot Dutch oven. Cover with the lid and bake for 20 minutes.
Remove the lid and bake for another 20 to 25 minutes, until the crust is a deep golden brown.
Let it cool on a wire rack for at least an hour before slicing. I know that’s painful. Do it anyway, or you’ll end up with a gummy center.
Substitutions & Variations
| Original | Swap | Notes |
|---|---|---|
| Bread flour | All-purpose flour | Slightly less chewy crumb, still works fine |
| Bread flour (partial) | Whole wheat flour | Swap up to 25% for a nuttier, denser loaf |
| Sea salt | Kosher salt | Use the same weight, not the same volume |
| Plain loaf | Add-ins | Fold in olives, roasted garlic, or shredded cheese during shaping |
| Round banneton | Loaf pan | Great for sandwich-style slices, less rustic crust |
Make-Ahead Tips
The cold proof step basically builds make-ahead time into the recipe itself. Your shaped dough can sit in the fridge for up to 24 hours before baking, which makes it easy to shape one evening and bake fresh bread the next morning.
You can also freeze the dough after shaping. Just thaw it in the fridge overnight before baking as usual.
Storage & Reheating
Sourdough stays good on the counter, cut side down on a cutting board, for about 3 days. Skip the plastic bag, it traps moisture and softens that crust you worked so hard for.
For longer storage, slice the whole loaf and freeze it in a zip-top bag. Pull out slices as needed and toast them straight from frozen.
To refresh a slightly stale loaf, run it under water for a few seconds and pop it in a 350°F oven for 10 minutes. It comes out tasting freshly baked.
Nutritional Snapshot
Per slice, based on a 12-slice loaf
- Calories: approximately 140
- Carbohydrates: 28g
- Protein: 5g
- Fat: 1g
- Fiber: 1g
Sourdough’s natural fermentation also breaks down some of the gluten and phytic acid in the flour, which is part of why a lot of people find it easier on their stomachs than regular bread.
Meal Pairings
- Sliced thick with butter and flaky salt for breakfast
- Alongside a bowl of soup or stew for dinner
- Toasted with avocado and a fried egg on top
- Torn into pieces for dipping in olive oil and balsamic
- Sliced thin for an open-faced sandwich with cured meats and cheese
FAQs Related to Sourdough bread Recipe
1. Why is my dough too sticky to work with?
Sourdough dough is naturally wetter than a lot of other bread doughs. Wet hands instead of adding more flour, and it’ll get easier to handle as the gluten develops.
2. My bread came out dense. What went wrong?
Usually this means the bulk fermentation was cut short, or your starter wasn’t active enough when you mixed the dough. Give both extra time next round.
3. Can I make this without a Dutch oven?
You can use a baking stone with a pan of hot water underneath to create steam, but a Dutch oven gives the most consistent, crackly results.
4. Do I need a stand mixer?
No. Sourdough dough comes together with hand mixing and folding. A stand mixer isn’t necessary here.
5. How do I know when the bulk ferment is done?
The dough should look puffy, jiggle slightly when you shake the bowl, and have visible air bubbles near the surface.
6. Can I use this recipe with a young starter?
It’s better to wait until your starter reliably doubles in size within 4 to 6 hours of feeding. A weak starter leads to a dense loaf.
7. Why does my crust turn out too hard?
Letting the loaf sit uncovered in the fridge without a lid overnight can dry out the surface. Keep your banneton covered with a shower cap or plastic wrap during the cold proof.
8. Is it normal for the dough to smell sour or boozy?
Yes, that smell is a good sign your fermentation is active. A sharp, vinegar-like smell means the dough went a bit too long, so pull back the bulk ferment time next time.
Conclusion
Sourdough takes patience, but it’s not complicated once you understand what’s actually happening at each step. Give this one a try and let me know how your loaf turns out in the comments. I read every single one, and I love hearing which tips helped the most.
If you run into any trouble along the way, drop a comment with your questions. I’m happy to help troubleshoot.