My kids used to come home from school like they hadn’t eaten in a week. Backpacks hit the floor, shoes went flying, and within ten seconds I’d hear “I’m STARVING” from somewhere in the house.
I tried the usual stuff. Crackers, string cheese, the occasional granola bar from a box that costs way more than it should. None of it actually held them over until dinner.
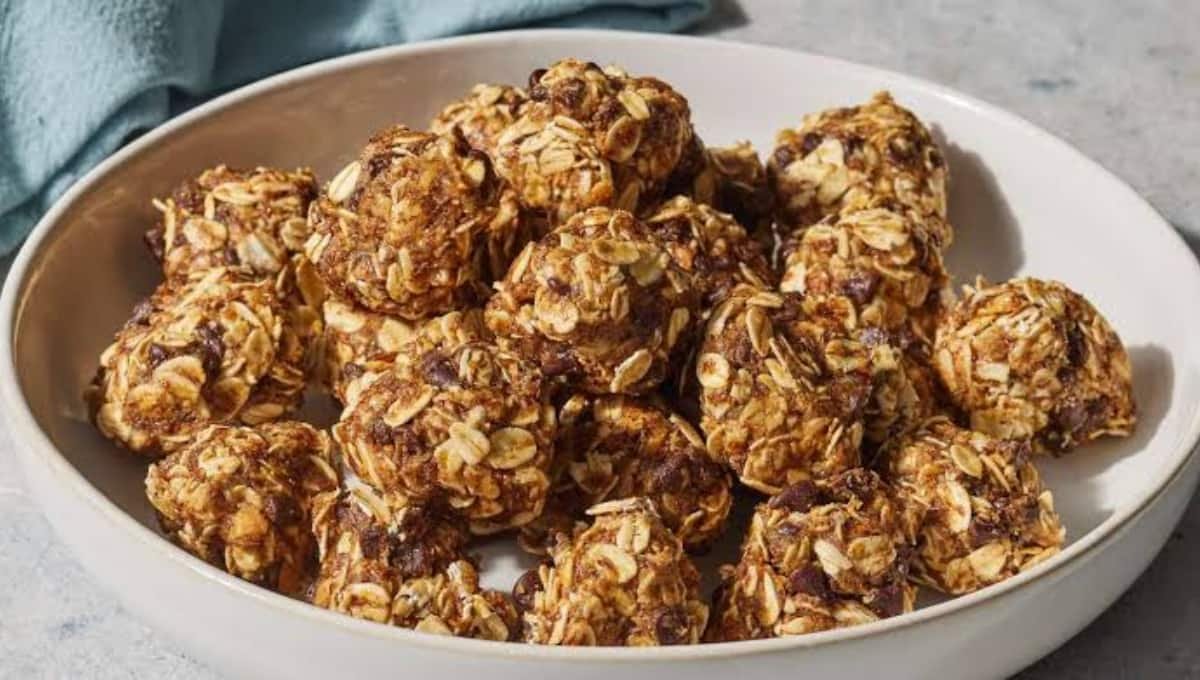
Then I started making these peanut butter oat bites and everything changed.
They’re rolled, not baked. They take about 15 minutes start to finish. And they somehow taste like a treat while actually keeping my kids full until dinner is ready.
Side Note: These have become such a staple in my house that I now keep a batch in the freezer at all times, just in case.
Let’s get into it.
What You’ll Need
| Ingredient | Amount |
|---|---|
| Old-fashioned rolled oats | 1 cup |
| Creamy peanut butter | 1/2 cup |
| Honey | 1/3 cup |
| Ground flaxseed | 2 tablespoons |
| Mini chocolate chips | 1/3 cup |
| Vanilla extract | 1 teaspoon |
| Pinch of salt | 1/4 teaspoon |
That’s it. Seven ingredients, most of which are probably already sitting in your pantry.
Read this also: Creamy Tuscan Tortellini That Tastes Like a Restaurant Cheated
Tools You’ll Need
- Mixing bowl
- Measuring cups and spoons
- Rubber spatula or wooden spoon
- Small cookie scoop (or just your hands)
- Baking sheet or plate lined with parchment paper
- Airtight container for storage
Pro Tips
1. Chill the mixture first. If your peanut butter is on the runnier side, pop the mixture in the fridge for 10 minutes before rolling. It makes a huge difference in how well the bites hold together.
2. Wet your hands slightly. The mixture is sticky. A little water on your palms keeps it from turning into a peanut butter glove situation.
3. Use old-fashioned oats, not instant. Instant oats break down too much and make the bites mushy instead of chewy. Old-fashioned rolled oats give you that satisfying bite.
4. Taste test the mix before rolling. This is the moment to adjust. Want it sweeter? Add a touch more honey. Want it more chocolatey? More chips never hurt anyone.
5. Make a double batch. I say this from experience. A single batch disappears in about two days in my house, and these freeze beautifully, so you might as well make extra while you’re at it.
How to Make Them
- Combine the dry ingredients. In a large mixing bowl, stir together the oats, flaxseed, and salt.
- Add the wet ingredients. Pour in the peanut butter, honey, and vanilla extract. Stir until everything is fully combined and no dry oats remain.
- Fold in the chocolate chips. Gently mix them through so they’re evenly distributed.
- Chill if needed. If the mixture feels too soft to roll, refrigerate it for 10 to 15 minutes.
- Roll into bites. Using a small cookie scoop or your hands, roll the mixture into balls about 1 inch wide. You should get around 18 to 20 bites.
- Set on parchment paper. Place each bite on your lined baking sheet as you go.
- Chill again before serving. Pop the tray in the fridge for at least 20 minutes so the bites firm up.
That’s genuinely all there is to it. No oven, no baking time, no waiting around.
Read this also: Pumpkin Cinnamon Rolls So Good, My Neighbor Came Knocking
Substitutions and Variations

| Swap This | For This | Why It Works |
|---|---|---|
| Peanut butter | Almond or sunflower seed butter | Nut-free schools will love the sunflower seed version |
| Honey | Maple syrup or agave | Makes it fully vegan |
| Mini chocolate chips | Raisins or dried cranberries | Cuts the sugar and adds a fruity chew |
| Ground flaxseed | Chia seeds | Same fiber boost, slightly different texture |
| Regular oats | Gluten-free rolled oats | Makes the whole recipe gluten-free |
Side Note: I’ve made the sunflower seed butter version for my son’s classroom snack day more times than I can count. Nobody has ever guessed it’s nut-free.
Make Ahead Tips
These bites are basically made for meal prep. Roll the entire batch on a Sunday and you’ll have snacks ready for the whole week. Here’s how I plan mine out:
- Fridge: Store in an airtight container for up to 1 week
- Freezer: Store in a freezer-safe bag or container for up to 3 months
- Grab and go: Pull a few from the freezer in the morning. They thaw by snack time and stay perfectly soft
I genuinely keep a bag of these in my freezer at all times now. It’s become a running joke in my house that the freezer isn’t allowed to run out of “the balls.”
Nutritional Snapshot
Per bite (based on 18 bites total):
- Calories: about 95
- Protein: 3g
- Fiber: 1.5g
- Sugar: 6g
This isn’t meant to replace a full meal, but it’s a solid bridge between school and dinner that won’t leave your kid bouncing off the walls from sugar alone.
Meal Pairing Ideas
Want to round these out into a fuller snack? Try pairing with:
- A glass of cold milk
- Sliced apple or banana
- A handful of grapes
- String cheese for extra protein
Leftovers and Storage
Here’s the truth: leftovers are rarely an issue with these.
But if you do end up with extras, keep them in an airtight container in the fridge. They’ll stay fresh and chewy for about a week.
If you notice the honey starting to make them a little sticky after a few days, just toss the container in the fridge instead of leaving it on the counter. It keeps them firmer for longer.
FAQs
1. Can I make these without a food processor?
Yes. This recipe doesn’t need one at all. Everything is mixed by hand in a bowl.
2. Why are my bites falling apart?
Usually this means the mixture needs a chill in the fridge before rolling, or you need a touch more peanut butter to help everything bind together.
3. Can toddlers eat these?
For younger kids, I’d recommend cutting the bites into smaller pieces or flattening them slightly to reduce choking risk.
4. How long do these actually last?
About a week in the fridge, or 3 months in the freezer. Honestly, mine never last that long.
5. Can I add protein powder?
Yes, though you may need to add a splash of milk or an extra spoonful of honey to keep the texture from getting too dry.
Conclusion
These little bites solved a real problem in my house, and I have a feeling they’ll do the same in yours. They’re quick enough to make on a busy weekday, sturdy enough to survive a backpack, and good enough that my kids ask for them by name now.
Give them a try, and let me know in the comments how yours turned out. If you tweak the recipe or find a combo you love, I’d genuinely love to hear about it.